Embarking on the journey of homemade yogurt opens up a world of delightful possibilities, but before you dive in, a crucial decision awaits: the method. For years, the traditional “boil” method, involving heating milk to a specific temperature and then cooling it, was the gold standard. However, the emergence of the “no-boil” or “cold start” method has revolutionized the process, promising convenience without compromise. Both paths lead to delicious yogurt, yet they offer distinct experiences in terms of effort, ingredients, and, most importantly, the final taste and texture. Let’s explore these two popular approaches to help you decide which is best suited for your kitchen and your palate.
The Fundamental Differences: Boil vs. No-Boil Yogurt Methods
At its core, yogurt making is about transforming milk with the help of beneficial bacteria. The primary distinction between the boil and no-boil methods lies in how the milk is prepared before these cultures are introduced.
Understanding the Boil Method for Yogurt
|
Our Picks for the Best Yogurt maker in 2026
As an Amazon Associate I earn from qualifying purchases.
|
||
| Num | Product | Action |
|---|---|---|
| 1 | Yogurt Maker, Compact Greek Yogurt Maker Machine with Constant Temperature Control, Stainless Steel Container, 1 Quart for Home Organic Yogurt |

|
| 2 | Yogurt Maker with Two Containers, Yogurt Maker Machine with Adjustable Temperature & Time Control, Automatic Shut-Off & Constant Temper for Homemade Probiotic Yogurt, Promoting Gut Health |
|
| 3 | Yogurt Dehydrator, Small-Batch Greek Yogurt Maker with Built-In Date Reminder Fresh, Simple & Just the Right Amount — Food-Grade BPA-Free Materials |
|
| 4 | Easy Yogurt Maker for Perfect Homemade Yogurt, 1.7 QT Electric Fermenter for Greek Yogurt, Rice Wine, Natto, with Digital Control & Auto Keep Warm, BPA-Free Container |
|
| 5 | Euro Cuisine YM80 Electric Yogurt Maker Machine- Promote Gut Health with Probiotic Rich Homemade Yogurt -Home Yogurt Incubator with Glass Jars, White |
|
| 6 | Yogurt Maker Machine, 8 Glass Jars with Lids Reusable for Yoghurt, Oatmeal, Pudding, or Jello, Food-Grade Martial, One-touch Control, Homemade Yogurt |
|
| 7 | Yogurt Maker with Adjustable Temperature & Time Control, Probiotic Yogurt Maker Machine with 8 Glass Jars, Automatic Shut-Off for Homemade Probiotic Yogurt, Promoting Gut Health(48OZ) |
|
| 8 | Euro Cuisine Yogurt Maker - YMX650 Automatic Digital Yogurt Maker Machine with Set Temperature - Includes 7-6 oz. Reusable Glass Jars and 7 Rotary Date Setting Lids for Instant Storage |
|
| 9 | GDOR Yogurt Maker with Adjustable Temp & Timer– Probiotic-Rich – Digital Greek Yogurt Machine with 8×6oz BPA-Free Glass Jars, Easy to Use for Home, Stainless Steel |
|
| 10 | Ultimate Probiotic Yogurt Maker with Adjustable Time & Temp Control - Make Trillions of Live Probiotics with Two 1-Quart Containers for Larger Batches - Greek Yogurt Maker - ULTIMATE LIFETIME WARRANTY |
|
The traditional boil method is a time-honored technique. It involves gently heating milk to a high temperature, typically between 180-195°F (82-91°C), and then allowing it to cool to an optimal incubation temperature of 110-115°F (43-46°C) before adding your starter culture. This initial heating serves several vital purposes. First, it effectively sterilizes the milk, eliminating any unwanted bacteria or pathogens that could compete with your beneficial yogurt cultures, ensuring a pure fermentation. Secondly, and perhaps most significantly for texture, heating denatures the whey proteins in the milk. These proteins, primarily lactoglobulin, unfold and bind with casein proteins as the milk cools, creating a more robust, thicker curd and reducing the likelihood of whey separation. A slight evaporation of water during heating also contributes to a richer, thicker end product.
The boil method offers the significant advantage of working with virtually any type of dairy milk you prefer, from whole to skim, raw to pasteurized. The primary drawbacks include the active time required for heating and precise cooling, which often necessitates a thermometer and an ice bath.
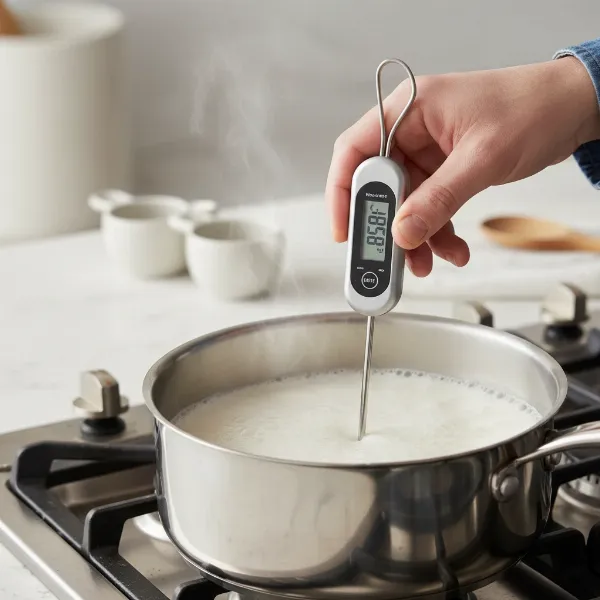 Person monitoring milk temperature with thermometer for homemade yogurt boil method.
Exploring the No-Boil Method for Yogurt
The no-boil, or cold start, method is a modern innovation designed for speed and simplicity. As its name suggests, it skips the initial heating and cooling steps entirely. Instead, you mix cold milk directly with your starter culture and then proceed to incubation. This method is only possible with specific types of milk: ultra-filtered or Ultra-High Temperature (UHT) pasteurized milk. These milks have already undergone intense heat treatment and often a filtration process, which renders them shelf-stable and denatures their proteins beforehand. Because the milk is essentially pre-processed, there’s no need for further sterilization or protein manipulation at home.
The convenience of the no-boil method is undeniable. It drastically cuts down on preparation time, eliminating the need for thermometers, constant stirring, and waiting for milk to cool. This simplicity makes it a favorite for busy home cooks or those using an Instant Pot or yogurt maker with a dedicated yogurt setting. While incredibly convenient, the no-boil method limits your milk choices to the more expensive ultra-filtered or UHT varieties.
Taste and Texture: A Direct Comparison
The journey from milk to yogurt is profoundly influenced by the preparation method, resulting in noticeable differences in the final sensory experience.
How the Boil Method Affects Flavor and Consistency
Yogurt made using the boil method often boasts a rich, tangy flavor profile that many traditionalists prefer. The careful heating and cooling process allow the beneficial bacteria to thrive in a sterile environment, producing lactic acid more consistently. This process contributes to a more pronounced “yogurt” flavor with a pleasant tartness that can deepen with longer incubation times.
Texturally, boiled yogurt is renowned for its firm, custardy, and incredibly creamy consistency. The denaturing of whey proteins during heating creates a dense, stable protein matrix that traps moisture effectively, leading to less whey separation. If you simmer the milk for an extended period, you might even detect a subtle “cooked milk” or caramel-like undertone, which some find adds to its complexity. This method excels at producing thick, spoonable yogurt that can easily be strained further for a Greek-style consistency.
The Taste and Texture of No-Boil Yogurt
No-boil yogurt tends to offer a milder, often sweeter, and sometimes described as a “cleaner” taste compared to its boiled counterpart. Because UHT and ultra-filtered milks have already undergone significant processing, their flavor profile can be slightly different from regular pasteurized milk, which may translate to the final yogurt. The level of tanginess in no-boil yogurt, much like traditional yogurt, will still vary based on the incubation time; longer incubation generally yields a more tart product.
When it comes to texture, no-boil yogurt made with ultra-filtered milk can achieve impressive thickness, often akin to Greek yogurt, without any straining. This is due to the milk’s inherent higher protein content and pre-denatured proteins. However, some UHT milks might yield a slightly thinner yogurt compared to a perfectly executed boiled batch, especially if they are not ultra-filtered. Despite these subtle variations, many home yogurt makers report little to no discernible difference in the creamy texture or overall quality between the two methods, especially when consumed plain or with flavorings.
Which Method is Right for Your Homemade Yogurt?
Choosing between the boil and no-boil methods ultimately comes down to your priorities in the kitchen: convenience, cost, or specific textural preferences.
Factors Influencing Your Choice: Milk Type and Starter
The type of milk you intend to use is the most significant determinant of your method. If you prefer to use standard pasteurized milk, raw milk, or organic milk that hasn’t been ultra-pasteurized, the boil method is your only reliable option. This ensures proper sterilization and protein restructuring. For the no-boil method, ultra-filtered milk (like Fairlife or Organic Valley Ultra) is highly recommended for best results, as its protein structure is already optimized for a thick set without heat. Ensure your starter culture, regardless of the method, contains live and active cultures to guarantee successful fermentation.
Time Commitment and Convenience
If time is a precious commodity, the no-boil method is a clear winner. It drastically reduces the hands-on time by eliminating the heating and cooling phases, allowing you to mix ingredients and begin incubation almost immediately. This makes it ideal for integrating yogurt making into a busy schedule, especially with the help of a yogurt maker or Instant Pot. The traditional boil method, while not overly complex, requires more active attention during the heating phase and a waiting period for the milk to cool, which can take an hour or more.
Equipment and Skill Level
The boil method typically requires a saucepan, a reliable thermometer to monitor milk temperatures, and potentially an ice bath for rapid cooling. It involves a bit more precision, making a thermometer a valuable tool for ensuring consistent results. The no-boil method, on the other hand, is inherently simpler. If you’re using an Instant Pot or a dedicated yogurt maker, the process becomes almost entirely hands-off, with no need for a thermometer or special cooling steps. This lower barrier to entry makes the no-boil method particularly appealing for beginners or those seeking an effortless routine.
Addressing Common Concerns: Safety and Sterilization
For the boil method, heating milk to 180-195°F is crucial for safety and quality. This process pasteurizes the milk, eliminating potentially harmful bacteria that could otherwise compete with your starter culture or even pose health risks. The no-boil method bypasses this step because the ultra-filtered or UHT milk has already been rigorously heat-treated and packaged under sterile conditions. Therefore, both methods, when executed correctly with appropriate milk types, result in safe and wholesome homemade yogurt.
Expert Tips for Both Boil and No-Boil Yogurt
Whether you’re a purist or a pragmatist, a few expert tips can elevate your homemade yogurt to perfection.
Mastering the Boil Method for Ultimate Creaminess
To achieve superior creaminess with the boil method, heat your milk slowly to the target temperature of 180-195°F and hold it there for 5-10 minutes to ensure maximum protein denaturing. Once heated, cool the milk quickly to 110-115°F, ideally using an ice bath, to prevent the growth of unwanted bacteria and preserve milk integrity before adding your starter. Consistent incubation temperature and an incubation time of 8-12 hours will yield a balanced tang and thick set.
Optimizing the No-Boil Method for Best Results
For the no-boil method, the key lies in selecting the right milk. Ultra-filtered milk varieties tend to produce the thickest and most consistent results. Always use a fresh starter culture with active live cultures, and ensure your incubation environment maintains a steady temperature, typically around 100-110°F. Longer incubation times will increase tanginess, so experiment to find your preferred flavor.
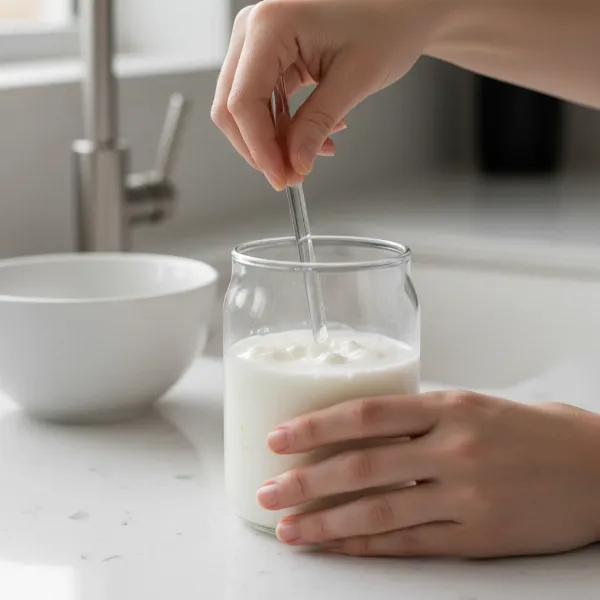 Hands mixing ultra-filtered milk and starter culture for no-boil yogurt in jar.
Troubleshooting Common Yogurt Making Issues
If your yogurt turns out too thin, it might be due to insufficient heating (in the boil method), inactive starter culture, or an inconsistent incubation temperature. Excessive tanginess usually indicates over-incubation, while too much whey can sometimes be managed by reducing incubation time or straining the yogurt. Consistent temperature control and fresh starter cultures are your best allies in preventing these common pitfalls.
Where to Find Reliable Yogurt Making Resources
Finding quality ingredients and trusted information is crucial for successful yogurt making. Look for starter cultures that explicitly state “live and active cultures” on the label, whether you opt for a store-bought plain yogurt or a specialized freeze-dried starter. High-quality milk, whether regular pasteurized for boiling or ultra-filtered for no-boil, will always contribute to a better-tasting end product. Many online communities and specialized websites offer extensive recipes, troubleshooting guides, and product recommendations to support your homemade yogurt journey.
Frequently Asked Questions
What kind of milk is best for no-boil yogurt?
Ultra-filtered milk, such as Fairlife or Organic Valley Ultra, is highly recommended for the no-boil method. These milks have higher protein content and have been pre-processed to yield a thick, creamy yogurt without the need for initial heating.
Can I use raw milk for the no-boil method?
No, raw milk should not be used for the no-boil method. Raw milk contains various microorganisms that can compete with your starter culture or pose health risks. It requires heating (the boil method) to ensure proper pasteurization and protein denaturation for safe and effective yogurt making.
How long does homemade yogurt last?
Properly stored homemade yogurt typically lasts for about 7-10 days in the refrigerator. Always ensure it’s kept in an airtight container to maintain freshness and prevent spoilage. If you notice any unusual smells, discoloration, or mold, it’s best to discard it.
Why is my homemade yogurt too thin?
Several factors can lead to thin homemade yogurt: insufficient heating of milk (boil method), an inactive starter culture, incorrect incubation temperature (too low or too high), or using milk with low protein content. Ensuring precise temperatures and a vigorous starter are key to a thicker set.
Do I need a yogurt maker for either method?
While a Yogurt Maker or an Instant Pot with a yogurt function can simplify maintaining a consistent incubation temperature, it’s not strictly necessary for either method. You can use an oven with a pilot light, a cooler with warm water, or even a warm spot in your home, provided you can maintain the ideal temperature range of 100-115°F (38-46°C) for several hours.