The journey to homemade yogurt is a delightful one, promising fresh, wholesome goodness free from artificial additives. As an experienced technician in the field of home yogurt making, I’ve witnessed the evolution of these simple yet transformative kitchen appliances. From basic models to sophisticated machines, a good yogurt maker is the cornerstone of crafting creamy, flavorful yogurt right in your kitchen. This comprehensive guide will navigate you through selecting, using, and maintaining your yogurt maker, ensuring every batch is a success.
The Essential Guide to Choosing Your Ideal Yogurt Maker
Choosing the right yogurt maker can seem daunting with the array of options available. Understanding the different types and key features will help you pinpoint the perfect appliance for your culinary adventures.
Understanding Different Yogurt Maker Types
Yogurt makers vary primarily in their operation and control, catering to different preferences and levels of involvement.
- Basic Electric Models: These are often the most straightforward, featuring a simple on/off switch. They maintain a consistent, pre-set temperature ideal for fermentation, requiring you to manually monitor the time. Their simplicity makes them budget-friendly and easy to use.
- Digital Models with Timers: Offering more control, these machines typically come with a digital display and programmable timers. This allows for precise fermentation times and often includes an automatic shut-off feature, providing convenience and preventing over-fermentation.
- Multi-Function Appliances: Some modern kitchen gadgets, like certain slow cookers or pressure cookers, integrate a “yogurt” setting. These versatile machines can be a space-saving option if you already own one or are looking for an appliance with multiple capabilities.
- Non-Electric/Insulated Yogurt Makers: These rely on insulation to maintain the fermentation temperature, often using hot water to kickstart the process. They are energy-independent and suitable for those preferring a more traditional, minimalist approach to yogurt making.
|
Our Picks for the Best Yogurt maker in 2026
As an Amazon Associate I earn from qualifying purchases.
|
||
| Num | Product | Action |
|---|---|---|
| 1 | Yogurt Maker with Two Containers, Yogurt Maker Machine with Adjustable Temperature & Time Control, Automatic Shut-Off & Constant Temper for Homemade Probiotic Yogurt, Promoting Gut Health |

|
| 2 | Ultimate Probiotic Yogurt Maker with Adjustable Time & Temp Control - Make Trillions of Live Probiotics with Two 1-Quart Containers for Larger Batches - Greek Yogurt Maker - ULTIMATE LIFETIME WARRANTY |
|
| 3 | Yogurt Maker, Compact Greek Yogurt Maker Machine with Constant Temperature Control, Stainless Steel Container, 1 Quart for Home Organic Yogurt |
|
| 4 | Euro Cuisine YM80 Electric Yogurt Maker Machine- Promote Gut Health with Probiotic Rich Homemade Yogurt -Home Yogurt Incubator with Glass Jars, White |
|
| 5 | Yogurt Dehydrator, Small-Batch Greek Yogurt Maker with Built-In Date Reminder Fresh, Simple & Just the Right Amount — Food-Grade BPA-Free Materials |
|
| 6 | Yogurt Maker Machine, 8 Glass Jars with Lids Reusable for Yoghurt, Oatmeal, Pudding, or Jello, Food-Grade Martial, One-touch Control, Homemade Yogurt |
|
| 7 | Yogurt Maker with Adjustable Temperature & Time Control, Probiotic Yogurt Maker Machine with 8 Glass Jars, Automatic Shut-Off for Homemade Probiotic Yogurt, Promoting Gut Health(48OZ) |
|
| 8 | GDOR Yogurt Maker with Adjustable Temp & Timer– Probiotic-Rich – Digital Greek Yogurt Machine with 8×6oz BPA-Free Glass Jars, Easy to Use for Home, Stainless Steel |
|
| 9 | Euro Cuisine Yogurt Maker - YMX650 Automatic Digital Yogurt Maker Machine with Set Temperature - Includes 7-6 oz. Reusable Glass Jars and 7 Rotary Date Setting Lids for Instant Storage |
|
| 10 | Easy Yogurt Maker for Perfect Homemade Yogurt, 1.7 QT Electric Fermenter for Greek Yogurt, Rice Wine, Natto, with Digital Control & Auto Keep Warm, BPA-Free Container |
|
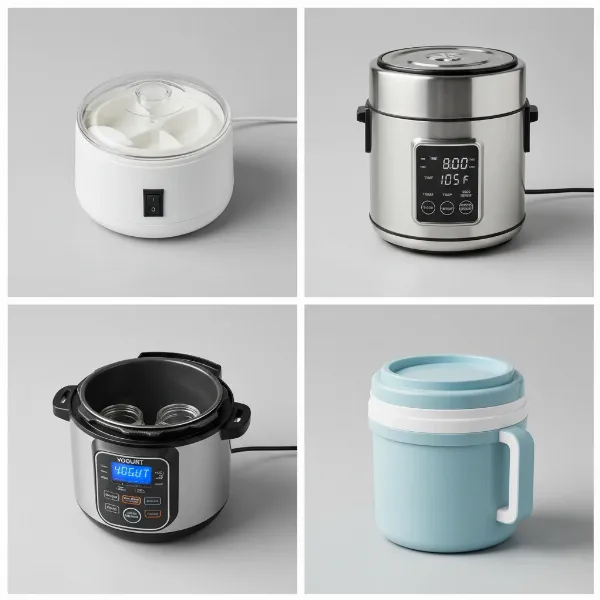 A collage showing different yogurt maker types, highlighting their unique features and designs.
Key Features to Consider Before You Buy
When evaluating a yogurt maker, several factors contribute to its overall performance, convenience, and durability.
- Capacity: Consider how much yogurt you consume. Yogurt makers come with individual glass jars (typically 6-8 jars, 6-8 ounces each) or a single large container (often 1-2 liters). Individual jars are excellent for portion control and varied flavors, while a bulk container is great for large families or those who prefer to serve from a single batch.
- Material: The materials used affect both safety and longevity.
- Glass jars: Preferred for health and taste purity, as glass is non-reactive and easy to clean.
- BPA-free plastic: A lighter and more shatter-resistant option for jars or outer casing.
- Stainless steel: Often used for inner linings or larger containers, providing excellent durability and heat retention.
- Control Features:
- Timer: An automatic timer with shut-off is highly convenient, allowing you to set and forget. Manual timers require you to turn off the machine yourself.
- Temperature Control: While most yogurt makers maintain a stable temperature, some advanced models offer adjustable temperature settings. This feature is beneficial for experimenting with different starter cultures that thrive at specific temperatures or for making various fermented foods.
- Digital Display: A clear digital display makes monitoring time and temperature settings straightforward.
- Design & Footprint: A compact design is crucial for small kitchens or limited countertop space. Aesthetics can also play a role, as you might want an appliance that complements your kitchen decor.
- Ease of Cleaning: Look for models with dishwasher-safe components, such as jars and lids, to simplify post-yogurt-making cleanup.
- Price: Yogurt makers range from very affordable basic models to more expensive feature-rich units. Determine your budget and balance it against the features that are most important to you.
Top Considerations for Your Home Yogurt Maker
The ideal yogurt maker delivers consistent results, is user-friendly, and stands the test of time. A reliable machine should effortlessly maintain the optimal fermentation temperature, which is critical for activating beneficial bacteria and ensuring a thick, creamy texture. Ease of use, from setup to cleaning, greatly enhances the overall experience, making homemade yogurt a joyful routine rather than a chore. Look for durability in materials and construction, promising years of fresh, delicious batches.
Mastering Your Yogurt Maker: Usage and Care
Making yogurt at home is a rewarding process. With a good yogurt maker and a few simple steps, you can consistently achieve perfect results.
A Step-by-Step Guide to Homemade Yogurt
Creating homemade yogurt involves a few key stages:
- Prepare Ingredients: You’ll need milk (dairy or non-dairy) and a starter culture. The starter can be a few tablespoons of store-bought plain yogurt with live active cultures, or a specialized powdered yogurt starter.
- Heat the Milk: Gently heat your milk to 180°F (82°C). This step denatures the milk proteins, resulting in a thicker yogurt and eliminating unwanted bacteria.
- Cool the Milk: Allow the milk to cool to between 108°F and 112°F (42°C-44°C). This temperature range is crucial for the starter cultures to thrive. If it’s too hot, it will kill the cultures; too cold, and they won’t activate properly.
- Add Starter Culture: Once the milk is at the correct temperature, whisk in your starter culture until fully incorporated.
- Incubate: Pour the mixture into your yogurt maker’s jars or container. Place them in the yogurt maker, cover, and set the timer according to your machine’s instructions or recipe (typically 6-12 hours). The longer the fermentation, the tangier and thicker the yogurt will be.
- Chill: Once fermentation is complete, remove the jars/container and refrigerate for at least 4 hours. Chilling stops the fermentation process and further thickens the yogurt.
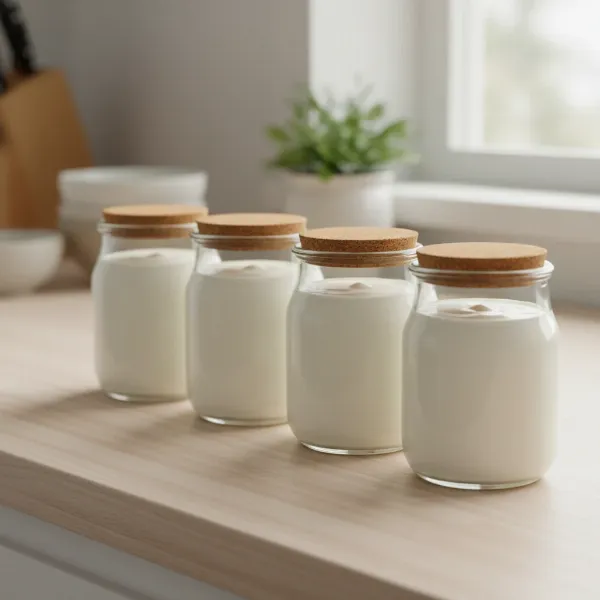 Freshly made creamy homemade yogurt in individual glass jars, ready for chilling and serving.
Tips for Achieving Creamy, Delicious Yogurt
- Choose High-Quality Milk: Higher fat milk (whole milk) generally yields creamier yogurt. Ultra-pasteurized milk may not work as well, as its proteins are too denatured.
- Use a Fresh Starter: A fresh starter with active cultures is vital for successful fermentation. If your previous batch was runny, it might be time for a new starter.
- Maintain Stable Temperature: Ensure your yogurt maker maintains a consistent temperature throughout the fermentation period. Fluctuations can lead to inconsistent results.
- Experiment with Fermentation Time: Adjust the fermentation time to achieve your desired tanginess and thickness. Shorter times result in milder yogurt, while longer times produce a more tart and firm product.
- Flavor After Fermentation: Add fruits, honey, vanilla, or other flavorings after the yogurt has finished incubating and cooled. Adding them beforehand can interfere with the fermentation process.
Cleaning and Maintaining Your Yogurt Maker
Proper cleaning and maintenance extend the life of your appliance and ensure hygienic yogurt production.
- After Each Use: Unplug the yogurt maker. Remove jars and lids, washing them thoroughly with warm, soapy water or placing them in the dishwasher if safe. Wipe down the base unit with a damp cloth; never immerse the electrical base in water.
- Deep Cleaning: Periodically, check for any residue build-up on the heating plate or in crevices and clean as needed.
- Storage: Store your yogurt maker in a dry, cool place away from direct sunlight. Ensure all components are completely dry before storing to prevent mold or odors.
Where to Purchase Quality Yogurt Makers
Quality yogurt makers are readily available from various retailers. You can find them at major electronics and home appliance stores, as well as large supermarkets. Online marketplaces offer a broad selection, often with competitive pricing and user reviews. When purchasing online, check seller ratings and return policies.
Conclusion
Embracing homemade yogurt is a healthy and enjoyable choice, and with the right yogurt maker, it’s a remarkably simple one. By understanding the types, features, and care involved, you empower yourself to craft delectable, customized batches tailored to your taste and dietary needs. Whether you prioritize capacity, control, or convenience, there’s a perfect yogurt maker waiting to become an indispensable part of your kitchen. Why wait to savor the creamy texture and rich flavor of fresh, homemade yogurt? Start your fermentation journey today!
Frequently Asked Questions
Can I use any type of milk in a yogurt maker?
Yes, most yogurt makers are versatile enough to work with various types of dairy milk (whole, skim, lactose-free) and many non-dairy alternatives like almond, soy, or coconut milk, though results may vary in texture and consistency.
How long does homemade yogurt typically last in the refrigerator?
Homemade yogurt, when stored in airtight containers in the refrigerator, usually stays fresh for about 7 to 10 days. Always check for signs of spoilage like unusual odor or mold before consuming.
Why is my homemade yogurt runny?
Runny yogurt can be caused by several factors, including insufficient incubation time, an unstable fermentation temperature (too low or too high), using an inactive starter culture, or not heating the milk adequately to denature proteins.
Can I make Greek yogurt with a standard yogurt maker?
You can make traditional yogurt with any yogurt maker, and then transform it into Greek yogurt by straining out the whey. This is typically done using a fine-mesh sieve lined with cheesecloth or a dedicated Greek yogurt strainer.