Imagine savoring the rich, tangy goodness of homemade yogurt without any of the discomfort that lactose intolerance can bring. For many, this has been a dream, but with modern ingredients and the convenience of a yogurt maker, creating delicious lactose-free yogurt at home is entirely within reach. Whether you’re navigating dietary restrictions or simply seeking a healthier alternative to store-bought options, mastering your yogurt maker to produce lactose-free batches can transform your daily routine. This comprehensive guide will walk you through every step, from selecting the right ingredients to perfecting your incubation, ensuring you achieve that desired creamy texture and delightful flavor right in your own kitchen.
Understanding Lactose-Free Yogurt
Before diving into the making, it’s helpful to understand what “lactose-free” truly means in the context of yogurt and how it’s achieved.
What Exactly is Lactose-Free Yogurt?
Lactose-free yogurt refers to yogurt that has had its lactose content significantly reduced or entirely removed. There are two primary categories:
- Enzyme-Treated Dairy Yogurt: This is regular dairy milk (typically cow’s milk) that has been treated with the lactase enzyme. Lactase breaks down lactose, the sugar found in milk, into simpler, more easily digestible sugars (glucose and galactose). The resulting milk is still dairy but is digestible for most lactose-intolerant individuals.
- Plant-Based Yogurt Alternatives: These yogurts are made from non-dairy milks such as soy, almond, coconut, or oat. Since these milks naturally do not contain lactose, the resulting yogurt is inherently lactose-free and also dairy-free.
|
Our Picks for the Best Yogurt maker in 2026
As an Amazon Associate I earn from qualifying purchases.
|
||
| Num | Product | Action |
|---|---|---|
| 1 | Yogurt Maker Machine, 8 Glass Jars with Lids Reusable for Yoghurt, Oatmeal, Pudding, or Jello, Food-Grade Martial, One-touch Control, Homemade Yogurt |

|
| 2 | Yogurt Maker with Adjustable Temperature & Time Control, Probiotic Yogurt Maker Machine with 8 Glass Jars, Automatic Shut-Off for Homemade Probiotic Yogurt, Promoting Gut Health(48OZ) |
|
| 3 | Ultimate Probiotic Yogurt Maker with Adjustable Time & Temp Control - Make Trillions of Live Probiotics with Two 1-Quart Containers for Larger Batches - Greek Yogurt Maker - ULTIMATE LIFETIME WARRANTY |
|
| 4 | Yogurt Maker with Two Containers, Yogurt Maker Machine with Adjustable Temperature & Time Control, Automatic Shut-Off & Constant Temper for Homemade Probiotic Yogurt, Promoting Gut Health |
|
| 5 | Euro Cuisine YM80 Electric Yogurt Maker Machine- Promote Gut Health with Probiotic Rich Homemade Yogurt -Home Yogurt Incubator with Glass Jars, White |
|
| 6 | Yogurt Dehydrator, Small-Batch Greek Yogurt Maker with Built-In Date Reminder Fresh, Simple & Just the Right Amount — Food-Grade BPA-Free Materials |
|
| 7 | GDOR Yogurt Maker with Adjustable Temp & Timer– Probiotic-Rich – Digital Greek Yogurt Machine with 8×6oz BPA-Free Glass Jars, Easy to Use for Home, Stainless Steel |
|
| 8 | Easy Yogurt Maker for Perfect Homemade Yogurt, 1.7 QT Electric Fermenter for Greek Yogurt, Rice Wine, Natto, with Digital Control & Auto Keep Warm, BPA-Free Container |
|
| 9 | Yogurt Maker, Compact Greek Yogurt Maker Machine with Constant Temperature Control, Stainless Steel Container, 1 Quart for Home Organic Yogurt |
|
| 10 | Euro Cuisine Yogurt Maker - YMX650 Automatic Digital Yogurt Maker Machine with Set Temperature - Includes 7-6 oz. Reusable Glass Jars and 7 Rotary Date Setting Lids for Instant Storage |
|
Understanding this distinction is key to choosing your ingredients and managing expectations regarding flavor and texture.
The Science of Lactose Reduction in Yogurt Making
Yogurt fermentation traditionally relies on beneficial bacteria (starter cultures) consuming lactose in milk, converting it into lactic acid, which thickens the milk and gives yogurt its characteristic tang. In enzyme-treated lactose-free dairy milk, much of the lactose is already broken down by added lactase. When a starter culture is then introduced, it ferments the remaining sugars, further reducing any trace lactose. For plant-based milks, the process involves fermenting the natural sugars present in the chosen plant milk, though some may require additional sugars or starches to aid the fermentation and thickening process. The sustained, warm temperature provided by a yogurt maker is crucial for these bacteria to thrive and perform their magic.
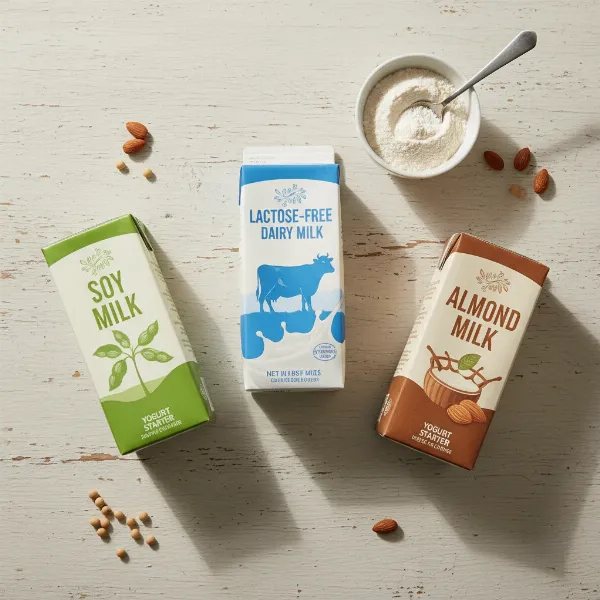 A variety of lactose-free milk options for homemade yogurt, including dairy and plant-based milks.
Choosing the Right Ingredients for Success
The foundation of exceptional homemade yogurt lies in the quality and type of your ingredients. Selecting them wisely is paramount for a successful lactose-free batch.
Selecting Your Milk: Dairy vs. Plant-Based Options
Your choice of milk greatly influences the final texture and flavor of your lactose-free yogurt.
- Lactose-Free Dairy Milk:
- UHT vs. Fresh: Ultra-High Temperature (UHT) treated lactose-free milk is widely available and convenient, as it doesn’t require pre-heating to sterilize. However, some traditional yogurt cultures might struggle slightly with highly processed UHT milk. Fresh lactose-free milk, which you’ll need to heat-treat (scald) before cooling, often yields a slightly thicker, more consistent yogurt. Brands like Fairlife are popular choices due to their higher protein content, which can contribute to a creamier yogurt.
- Plant-Based Milks:
- Soy Milk: Often a top choice for plant-based yogurt due to its high protein content, which mimics dairy milk’s ability to coagulate and thicken. Look for plain, unsweetened varieties without excessive additives.
- Coconut Milk: Full-fat canned coconut milk creates a wonderfully rich and creamy yogurt, though it will have a distinct coconut flavor. It might require thickeners for optimal consistency.
- Almond Milk & Oat Milk: These can be used, but generally produce a thinner yogurt compared to soy or coconut. They almost always require added thickeners to achieve a spoonable consistency. Homemade nut milk can sometimes offer better results than store-bought versions.
Essential Starter Cultures for Lactose-Free Yogurt
The starter culture is the heart of your yogurt, containing the beneficial bacteria that ferment the milk.
- Specialized Lactose-Free/Vegan Starters: For reliable results with non-dairy milks, consider starter cultures specifically designed for them. Brands like Belle + Bella, Yo Gourmet, or MinusMilk™ are formulated to thrive in plant-based environments and are often vegan, non-GMO, and gluten-free. These typically contain a blend of live active cultures essential for fermentation.
- Using Existing Lactose-Free Yogurt: You can also use a few spoonfuls of a store-bought plain lactose-free yogurt (dairy or plant-based) that explicitly states “live active cultures” on its label as your starter. This method is convenient but ensure the starter yogurt is fresh and free from artificial sweeteners or flavors that could interfere with fermentation.
- Considerations for Regular Cultures: While some traditional dairy cultures might work with enzyme-treated lactose-free cow’s milk, using a longer fermentation time (up to 24 hours) can help ensure maximum lactose consumption by the bacteria, making it more digestible. However, this method will not make the yogurt dairy-free.
Preparing Your Yogurt Maker and Workspace
Proper preparation is vital for successful yogurt making, especially when dealing with specific dietary needs.
Gathering Your Tools: Beyond Just the Machine
Beyond your reliable yogurt maker, a few key tools will simplify the process and ensure accuracy:
- Food Thermometer: Essential for accurately measuring milk temperature during heating and cooling phases. The cultures are sensitive to temperature, and too hot or too cold can inhibit their growth.
- Whisk: For thoroughly mixing the starter culture into the milk.
- Jars or Containers: Sterilized jars (usually provided with your yogurt maker) for incubating your yogurt. Glass is generally preferred for hygiene and inertness.
- Saucepan: For heating fresh lactose-free dairy milk or plant milks if required.
The Importance of Sterilization
Sterilization is not just a recommendation; it’s a critical step to prevent unwanted bacteria from contaminating your yogurt batch. Any foreign bacteria can compete with your starter culture, leading to inconsistent results, off-flavors, or even spoilage. Ensure all equipment that will come into contact with your milk (saucepan, whisk, thermometer, jars, and yogurt maker components) is thoroughly cleaned and sterilized. You can do this by washing with hot soapy water, then boiling for 10 minutes, or running them through a hot dishwasher cycle. Allow everything to air dry completely before use.
Step-by-Step Guide to Making Homemade Lactose-Free Yogurt
Ready to create your own creamy masterpiece? Follow these steps for a successful batch of lactose-free yogurt.
Heating and Cooling Your Milk Precisely
Temperature control is perhaps the most crucial factor in yogurt making. The goal is to create an optimal environment for your starter culture.
- For Fresh Lactose-Free Dairy Milk or Most Plant Milks (except UHT): Heat the milk in a saucepan to 180°F (82°C). This process denatures the milk proteins, which helps create a thicker yogurt and eliminates any undesirable bacteria. Maintain this temperature for about 10 minutes.
- For UHT Lactose-Free Dairy Milk: You can often skip the heating step and warm the milk gently to the inoculation temperature, or even use it straight from the carton if the recipe allows. Some sources suggest warming UHT milk slightly to between 98-105°F (37-41°C) to avoid unbalanced culture growth.
- Cooling: After heating, it’s vital to cool the milk down to the ideal inoculation temperature of 100-112°F (38-45°C). Temperatures above 115°F (45°C) can kill the delicate probiotic cultures, while temperatures below 95°F (35°C) may result in a weaker fermentation. To speed cooling, place the saucepan in an ice bath, stirring occasionally, until it reaches the target temperature. A skin may form on top; you can leave this or gently remove it.
Incorporating the Starter Culture
Once your milk has reached the correct temperature, it’s time to add the starter.
- Measure out your chosen starter culture. If using a powdered starter, typically one packet is sufficient for 1-2 liters of milk. If using a pre-made yogurt, usually 2-4 tablespoons per quart (liter) of milk is a good ratio.
- Gently whisk the starter into the cooled milk until it is thoroughly combined. Avoid aggressive whisking, which can introduce too much air. Ensure there are no lumps of starter remaining.
The Incubation Process in Your Yogurt Maker
This is where your yogurt maker shines, maintaining the precise temperature needed for fermentation.
- Pour the inoculated milk into your sterilized jars or directly into the yogurt maker’s container, depending on its design. Do not cover the individual jars tightly if your yogurt maker has a main lid.
- Place the containers into your yogurt maker. If your machine has a water bath, ensure it’s filled to the recommended level.
- Set your yogurt maker to the recommended temperature, typically around 100-112°F (38-45°C). Many machines have a dedicated “yogurt” setting.
- Incubation Time: This can vary significantly, from 8 to 24 hours.
- 8-12 hours: Generally produces a milder, less tangy yogurt.
- 12-24 hours: Results in a tangier, often thicker yogurt, as the cultures have more time to ferment. Longer times are particularly useful for reducing lactose content in dairy milk. For thicker, Greek-style yogurt, aim for the longer end of the spectrum.
- Once the incubation is complete, turn off your yogurt maker. You may notice some condensation under the lid; carefully remove it, allowing any water to drip back.
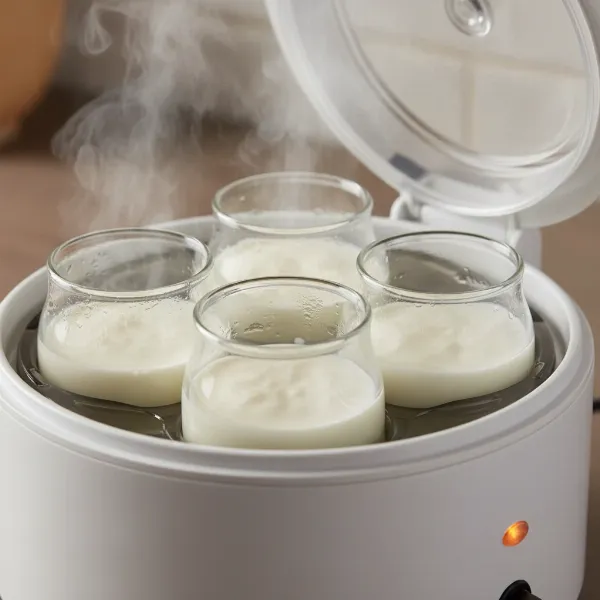 Jars of milk incubating inside a modern electric yogurt maker, showing the fermentation process.
Chilling for Optimal Texture
After incubation, your yogurt needs to cool down to set properly and develop its final texture.
- Remove the yogurt jars from the maker and cover them with lids.
- Refrigerate for at least 6-8 hours, or preferably overnight. The cold temperature will halt the fermentation process and allow the proteins to firm up, resulting in a thicker, more cohesive yogurt. Avoid stirring the warm yogurt immediately after incubation, as this can break its delicate structure.
- Achieving Desired Thickness (Especially for Plant-Based):
- Many plant-based milks naturally produce a thinner yogurt. To counteract this, consider adding thickeners.
- Agar-Agar: A plant-based gelatin substitute. Whisk 1/2-1 teaspoon per quart of milk into the milk before heating.
- Tapioca Starch/Powder: Can be whisked into cold milk before heating to help thicken. Use about 1-2 tablespoons per quart.
- Pectin or Gelatin: Can also be used, following package instructions.
- Straining: For a Greek-style texture, especially with plant-based yogurts, you can strain the chilled yogurt through a cheesecloth-lined sieve for several hours in the refrigerator. This removes excess liquid (whey), resulting in a much thicker consistency.
Troubleshooting Common Lactose-Free Yogurt Challenges
Even experienced yogurt makers encounter issues. Here’s how to tackle common problems with lactose-free batches.
Why Isn’t My Yogurt Setting?
This is one of the most frustrating problems, but often has a simple solution:
- Starter Viability: Ensure your starter culture is fresh and contains live active cultures. Expired or inactive starters won’t ferment properly.
- Temperature Issues:
- Milk too hot: If the milk was too hot when the starter was added (above 115°F/45°C), the cultures might have been killed.
- Milk too cold: If the milk was too cold (below 95°F/35°C) or the yogurt maker’s temperature was inconsistent, the cultures may not have activated or grown sufficiently.
- Milk Type: Some plant milks (like certain almond or oat milks with low protein or many additives) are more challenging to ferment and thicken without added thickeners. Highly processed (e.g., ultra-pasteurized) dairy or plant milks can also sometimes inhibit cultures.
- Insufficient Fermentation Time: A shorter incubation period might result in a thinner, unset yogurt. Try extending the fermentation time.
- Thickener Issues (for Plant-Based): If using plant milk, ensure you added enough thickener, and that it was properly incorporated before heating.
Flavor and Texture Adjustments
The beauty of homemade yogurt is customizing it to your taste.
- Too Sour: Reduce incubation time. A shorter fermentation means less lactic acid production.
- Too Mild: Increase incubation time. A longer fermentation allows more lactic acid to develop, increasing tanginess.
- Grainy or Lumpy Texture: This can occur if milk was heated too quickly, or cultured at too high a temperature. For plant-based milks, uneven distribution of thickeners can also lead to graininess. Ensuring thorough whisking and consistent heating/cooling helps.
- Separated Whey: A small amount of clear liquid (whey) on top is normal, especially with longer fermentation or plant-based milks. This can be stirred back in, or strained off for a thicker yogurt. Excessive separation or a lumpy texture can indicate culturing too hot or for too long, causing the proteins to curdle.
Enhancing and Storing Your Homemade Creation
Once your lactose-free yogurt is perfectly set and chilled, it’s ready to be enjoyed!
Flavoring Your Lactose-Free Yogurt
While plain yogurt is versatile, you can easily customize it to your liking:
- Natural Sweeteners: Stir in maple syrup, honey (if not vegan), agave nectar, or a sugar substitute after the yogurt has chilled.
- Fruits: Fresh berries, sliced bananas, or fruit purees make excellent additions.
- Extracts: A few drops of vanilla extract, almond extract, or other flavorings can elevate the taste. Add these after fermentation to avoid interfering with the cultures.
- Spices: A pinch of cinnamon or cardamom can add warmth.
Best Practices for Storage
Proper storage ensures your homemade lactose-free yogurt remains fresh and safe to eat.
- Store your yogurt in airtight containers in the refrigerator.
- Homemade yogurt typically lasts for 1 to 2 weeks, similar to commercial varieties. Always check for any off-smells or unusual textures before consuming, as homemade products lack preservatives.
- Avoid cross-contamination by using clean spoons each time you scoop out yogurt.
Making lactose-free yogurt in your machine is a rewarding experience that puts you in control of your diet and well-being. With the right ingredients, careful temperature management, and a little patience, you’ll be enjoying fresh, creamy, and gut-friendly yogurt whenever you desire. So, go ahead, unlock the potential of your Yogurt Maker and delight in the delicious world of homemade lactose-free goodness!
Frequently Asked Questions
Can I use any lactose-free milk to make yogurt?
While you can use many types of lactose-free milk, results vary. Lactose-free dairy milk (especially with higher protein like Fairlife) and soy milk often yield the best texture. Other plant milks like almond or oat milk may require thickeners for a spoonable consistency.
How do I make my homemade lactose-free yogurt thicker?
To achieve a thicker texture, especially with plant-based milks, consider adding thickeners like agar-agar or tapioca starch before heating the milk. You can also strain the finished, chilled yogurt through cheesecloth to remove excess whey, resulting in a denser, Greek-style consistency.
What is the ideal temperature for incubating lactose-free yogurt in a machine?
The ideal incubation temperature for lactose-free yogurt typically ranges from 100-112°F (38-45°C). Maintaining a consistent temperature within this range is crucial for the starter cultures to thrive and ferment effectively, leading to a properly set yogurt.
How long does homemade lactose-free yogurt last in the refrigerator?
Homemade lactose-free yogurt, when stored in airtight containers in the refrigerator, generally remains fresh for 1 to 2 weeks. Always rely on your senses to check for freshness before consuming, as homemade products do not contain preservatives.
Do I need a special starter for lactose-free yogurt?
For plant-based yogurts, it’s highly recommended to use a specialized vegan or non-dairy starter culture, as these are formulated to ferment non-dairy milks effectively. For lactose-free dairy milk, you can often use a regular dairy yogurt starter or a specific lactose-free one.
Is “lactose-free” the same as “dairy-free”?
No, “lactose-free” is not the same as “dairy-free.” Lactose-free dairy yogurt is made from cow’s milk that has been treated to remove lactose, but it still contains dairy proteins. Dairy-free yogurt, on the other hand, is made entirely from plant-based milks and contains no dairy ingredients whatsoever.
Can I make lactose-free Greek yogurt in my machine?
Yes, you can make lactose-free Greek yogurt. After your lactose-free yogurt has incubated and chilled, simply strain it through a cheesecloth-lined sieve for several hours in the refrigerator. This process removes excess whey, resulting in a much thicker, more concentrated Greek-style yogurt.