Have you ever dreamt of scooping into a perfectly rich, velvety smooth homemade yogurt, only to find your batches a little too thin or watery? The quest for that ideal creamy texture often begins with one fundamental ingredient: whole milk. As an experienced technician in homemade yogurt making, I’ve seen firsthand how the choice of milk can transform your culinary creations. Whole milk is not just a preference; it’s a game-changer, offering a depth of flavor and luxurious consistency that other milk types simply can’t match. This guide will explore the science behind why whole milk is the ultimate foundation for consistently creamier yogurt and how you can achieve delicious results every time.
The Creamy Science of Whole Milk in Yogurt Making
Crafting exceptional yogurt is a delicate balance of microbiology and dairy chemistry. The inherent composition of whole milk provides distinct advantages that directly influence the final texture and richness of your homemade yogurt.
Understanding Milk Fat: The Foundation of Creaminess
|
Our Picks for the Best Yogurt maker in 2026
As an Amazon Associate I earn from qualifying purchases.
|
||
| Num | Product | Action |
|---|---|---|
| 1 | GDOR Yogurt Maker with Adjustable Temp & Timer– Probiotic-Rich – Digital Greek Yogurt Machine with 8×6oz BPA-Free Glass Jars, Easy to Use for Home, Stainless Steel |

|
| 2 | Euro Cuisine YM80 Electric Yogurt Maker Machine- Promote Gut Health with Probiotic Rich Homemade Yogurt -Home Yogurt Incubator with Glass Jars, White |
|
| 3 | Easy Yogurt Maker for Perfect Homemade Yogurt, 1.7 QT Electric Fermenter for Greek Yogurt, Rice Wine, Natto, with Digital Control & Auto Keep Warm, BPA-Free Container |
|
| 4 | Yogurt Maker with Adjustable Temperature & Time Control, Probiotic Yogurt Maker Machine with 8 Glass Jars, Automatic Shut-Off for Homemade Probiotic Yogurt, Promoting Gut Health(48OZ) |
|
| 5 | Yogurt Maker with Two Containers, Yogurt Maker Machine with Adjustable Temperature & Time Control, Automatic Shut-Off & Constant Temper for Homemade Probiotic Yogurt, Promoting Gut Health |
|
| 6 | Ultimate Probiotic Yogurt Maker with Adjustable Time & Temp Control - Make Trillions of Live Probiotics with Two 1-Quart Containers for Larger Batches - Greek Yogurt Maker - ULTIMATE LIFETIME WARRANTY |
|
| 7 | Yogurt Dehydrator, Small-Batch Greek Yogurt Maker with Built-In Date Reminder Fresh, Simple & Just the Right Amount — Food-Grade BPA-Free Materials |
|
| 8 | Yogurt Maker Machine, 8 Glass Jars with Lids Reusable for Yoghurt, Oatmeal, Pudding, or Jello, Food-Grade Martial, One-touch Control, Homemade Yogurt |
|
| 9 | Euro Cuisine Yogurt Maker - YMX650 Automatic Digital Yogurt Maker Machine with Set Temperature - Includes 7-6 oz. Reusable Glass Jars and 7 Rotary Date Setting Lids for Instant Storage |
|
| 10 | Yogurt Maker, Compact Greek Yogurt Maker Machine with Constant Temperature Control, Stainless Steel Container, 1 Quart for Home Organic Yogurt |
|
The most significant factor contributing to the irresistible creaminess of whole milk yogurt is its fat content. Whole milk typically contains around 3.25-3.5% milk fat, a higher percentage compared to its lower-fat counterparts. These fat globules are suspended in the milk and, during the fermentation process, become integral to the yogurt’s structure. They coat the protein strands, preventing them from clumping too tightly and instead forming a softer, more interconnected network. This results in a smoother, richer mouthfeel and a thicker, more satisfying texture. Without this ample fat, the yogurt tends to be more gelatinous and less luxurious.
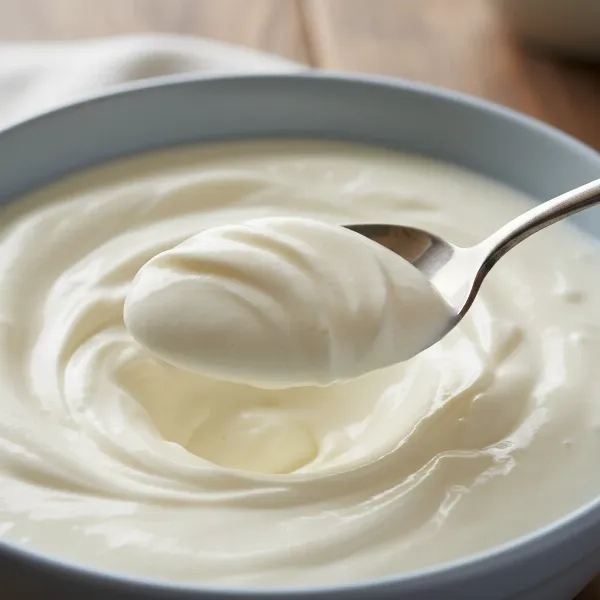 Close-up of rich, thick homemade yogurt made with whole milk, showing its creamy texture.
The Role of Protein: Beyond Just Thickness
While fat is crucial for creaminess, milk proteins, primarily casein and whey proteins, are the architects of yogurt’s thickness and structure. Whole milk contains a robust amount of these proteins. During the incubation period, the beneficial bacteria consume lactose (milk sugar) and produce lactic acid. This increase in acidity causes the casein proteins to coagulate and form a gel-like matrix, which is the basic structure of yogurt.
Heating the milk before adding your starter culture is a vital step often called “scalding.” This process denatures the whey proteins, causing them to unwind and integrate into the casein matrix rather than remaining inactive. This effectively increases the amount of protein available to contribute to the yogurt’s structure, leading to an even thicker and more stable set. Combined with the fat content, this enhanced protein network makes for a truly luscious and creamy yogurt.
Whole Milk vs. Other Milk Types for Yogurt
When you stand in the dairy aisle, the choices seem endless. However, for the serious home yogurt maker aiming for optimal creaminess, the distinction between milk types is profound.
Whole Milk: The Unrivaled Choice for Richness
For a yogurt that boasts a rich flavor, a full-bodied texture, and that desirable “cream on top” layer, whole milk is undeniably the superior choice. Its natural fat content translates directly into a more indulgent product, reminiscent of traditionally made yogurts. The richness isn’t just about thickness; it’s about the entire sensory experience – the way it coats your tongue and leaves a lingering, satisfying taste. Many find that yogurt made with whole milk has a less tart, more mellow flavor profile, allowing other additions like fruit and honey to shine.
“The fat in whole milk acts like a natural emulsifier, binding with the milk solids during fermentation to create an incredibly smooth and stable texture that simply can’t be replicated with lower-fat options.”
Low-Fat and Skim Milk: Compromises and Solutions
While it’s possible to make yogurt with 2% (low-fat) or skim (non-fat) milk, the results will inherently be thinner and less creamy due to the reduced or absent fat content. These yogurts often have a more pronounced tartness and a less substantial mouthfeel. If you prefer to use lower-fat milk for health reasons or personal preference, there are ways to improve the texture:
- Add Dry Milk Powder: Stirring in a few tablespoons of non-fat dry milk powder per quart of liquid milk before heating can significantly boost the protein content, leading to a thicker set.
- Strain After Fermentation: For a thicker, Greek-style yogurt, straining the finished product through cheesecloth or a fine-mesh sieve will remove excess whey, concentrating the solids and dramatically increasing its thickness. This also intensifies the flavor.
The Pasteurization Puzzle: Why it Matters
Beyond fat content, the type of pasteurization your milk has undergone can also impact your yogurt’s success. Most milk found in grocery stores is pasteurized. However, ultra-pasteurized (UHT) milk, which is heated to much higher temperatures for a shorter time, can sometimes interfere with the yogurt-making process. The intense heat can alter the milk proteins in a way that makes it harder for the yogurt cultures to form a firm set. For the most reliable results, opt for conventionally pasteurized (often labeled “pasteurized” without the “ultra”) whole milk whenever possible.
Maximizing Creaminess in Your Homemade Yogurt
Achieving that impossibly creamy texture goes beyond just choosing the right milk; it also involves smart techniques during the yogurt-making process.
Pre-Heating Your Milk: A Crucial Step
As mentioned earlier, scalding your milk is a fundamental step for creamier yogurt. Heat your whole milk slowly to a temperature of around 180-195°F (82-90°C) and hold it there for 10-15 minutes. This process denatures the whey proteins, allowing them to better integrate into the casein network. It also reduces any unwanted bacteria that might compete with your starter culture. After heating, allow the milk to cool to the ideal incubation temperature of 105-115°F (40-46°C) before adding your starter.
 Hands stirring whole milk in a saucepan, checking temperature with a digital thermometer for yogurt.
Incubation and Beyond: Perfecting the Texture
The incubation phase is where the magic happens. Maintaining a consistent temperature within the ideal range allows the yogurt cultures to thrive, fermenting the lactose into lactic acid and thickening the milk. Avoid disturbing the yogurt during this time. Once your yogurt has set, typically after 6-10 hours, chilling it in the refrigerator for several hours further firms up the texture. If you desire an even thicker, Greek-style whole milk yogurt, simply strain it through cheesecloth in a colander in the refrigerator until it reaches your preferred consistency. The longer you strain, the thicker it will become.
Expert Insights for Your Creamiest Batch
To truly master the art of creamy yogurt, consider these tips:
- Quality Ingredients: Start with the freshest, highest-quality whole milk you can find. Local farm milk, if available, can make an incredible difference in flavor and texture.
- Consistent Temperature: A reliable yogurt maker or an accurate thermometer is your best friend for maintaining the precise temperatures needed for successful fermentation and protein denaturation.
- Fresh Starter Culture: Always use a fresh, active starter culture (either a store-bought plain yogurt with live cultures or a dedicated powdered starter) to ensure robust fermentation.
Conclusion
The journey to making wonderfully creamy, delicious homemade yogurt is a rewarding one, and it starts with a simple, yet powerful, ingredient: whole milk. By understanding the critical role of milk fat and protein, and by employing sound techniques like proper pre-heating and optional straining, you can consistently achieve that coveted velvety texture and rich flavor that elevates your homemade batches far beyond store-bought varieties. Embrace the beauty of whole milk in your Yogurt Maker, experiment with flavors, and savor the superior results. What will you create with your next perfectly creamy batch of yogurt?
Frequently Asked Questions
Can I use raw milk for yogurt?
Yes, you can use raw milk for yogurt, and some people prefer it for its unique flavor and potential benefits. However, you’ll still need to heat raw milk to around 180-195°F (82-90°C) to denature proteins and ensure proper thickening, then cool it before adding your starter culture.
Does adding milk powder help with thickness?
Absolutely. Adding non-fat dry milk powder to your whole milk before heating it increases the total protein content. This extra protein contributes significantly to a firmer, thicker yogurt texture, especially beneficial if you want an extra-dense result without extensive straining.
Why did my yogurt turn out thin even with whole milk?
Several factors can lead to thin yogurt, even with whole milk. Common culprits include insufficient pre-heating of the milk (not denaturing enough whey protein), incorrect incubation temperature (too hot or too cold, hindering bacterial activity), or a weak/inactive starter culture.
What’s the ideal incubation temperature for creamy yogurt?
The ideal incubation temperature for creamy yogurt typically ranges between 105-115°F (40-46°C). Maintaining a consistent temperature within this range is crucial for the starter cultures to ferment properly and create the desired thickness and flavor profile.
Can I make Greek yogurt with whole milk?
Yes, whole milk is an excellent choice for making Greek yogurt. To achieve the signature thick consistency of Greek yogurt, simply make your whole milk yogurt as usual, and then strain it through cheesecloth for several hours (or overnight) to remove the whey until it reaches your desired thickness.