Imagine a dairy delight that’s richer than Greek yogurt, creamier than most cheeses, and packed with protein to fuel your day. That’s skyr, Iceland’s ancient superfood, a staple that has nourished generations. While readily available in stores, crafting this exquisite treat in your own kitchen offers a uniquely rewarding experience. Making skyr at home isn’t just about saving money; it’s about controlling ingredients, customizing flavors, and mastering a traditional art that brings a touch of Icelandic culinary magic right to your table. If you’ve ever dreamt of creating perfectly thick, mildly tangy skyr, then you’re in the right place to begin your delicious journey.
The Essential Guide to Crafting Skyr at Home
Delving into the world of homemade skyr might seem daunting, but with the right guidance, it’s an incredibly accessible and rewarding process. This comprehensive guide will walk you through every step, from understanding what makes skyr unique to troubleshooting common issues, ensuring your homemade batches are consistently perfect.
Understanding Skyr: More Than Just Yogurt
|
Our Picks for the Best Yogurt maker in 2026
As an Amazon Associate I earn from qualifying purchases.
|
||
| Num | Product | Action |
|---|---|---|
| 1 | GDOR Yogurt Maker with Adjustable Temp & Timer– Probiotic-Rich – Digital Greek Yogurt Machine with 8×6oz BPA-Free Glass Jars, Easy to Use for Home, Stainless Steel |

|
| 2 | Euro Cuisine YM80 Electric Yogurt Maker Machine- Promote Gut Health with Probiotic Rich Homemade Yogurt -Home Yogurt Incubator with Glass Jars, White |
|
| 3 | Euro Cuisine Yogurt Maker - YMX650 Automatic Digital Yogurt Maker Machine with Set Temperature - Includes 7-6 oz. Reusable Glass Jars and 7 Rotary Date Setting Lids for Instant Storage |
|
| 4 | Yogurt Maker with Two Containers, Yogurt Maker Machine with Adjustable Temperature & Time Control, Automatic Shut-Off & Constant Temper for Homemade Probiotic Yogurt, Promoting Gut Health |
|
| 5 | Ultimate Probiotic Yogurt Maker with Adjustable Time & Temp Control - Make Trillions of Live Probiotics with Two 1-Quart Containers for Larger Batches - Greek Yogurt Maker - ULTIMATE LIFETIME WARRANTY |
|
| 6 | Easy Yogurt Maker for Perfect Homemade Yogurt, 1.7 QT Electric Fermenter for Greek Yogurt, Rice Wine, Natto, with Digital Control & Auto Keep Warm, BPA-Free Container |
|
| 7 | Yogurt Maker Machine, 8 Glass Jars with Lids Reusable for Yoghurt, Oatmeal, Pudding, or Jello, Food-Grade Martial, One-touch Control, Homemade Yogurt |
|
| 8 | Yogurt Dehydrator, Small-Batch Greek Yogurt Maker with Built-In Date Reminder Fresh, Simple & Just the Right Amount — Food-Grade BPA-Free Materials |
|
| 9 | Yogurt Maker, Compact Greek Yogurt Maker Machine with Constant Temperature Control, Stainless Steel Container, 1 Quart for Home Organic Yogurt |
|
| 10 | Yogurt Maker with Adjustable Temperature & Time Control, Probiotic Yogurt Maker Machine with 8 Glass Jars, Automatic Shut-Off for Homemade Probiotic Yogurt, Promoting Gut Health(48OZ) |
|
Skyr (pronounced “skeer”) is an Icelandic cultured dairy product that has been a cornerstone of the nation’s diet for over a thousand years. Often categorized alongside yogurts, it technically functions more like a fresh, strained cheese due to its production method. The key difference lies in its unique starter cultures and the addition of rennet, which helps separate the milk solids (curds) from the liquid (whey) more effectively than traditional yogurt. This results in a product significantly thicker and creamier than most yogurts, including Greek yogurt, and boasts an impressively high protein content with very little fat when made with skim milk. Its flavor is typically milder and less tart than other fermented dairy products, making it a versatile base for both sweet and savory applications.
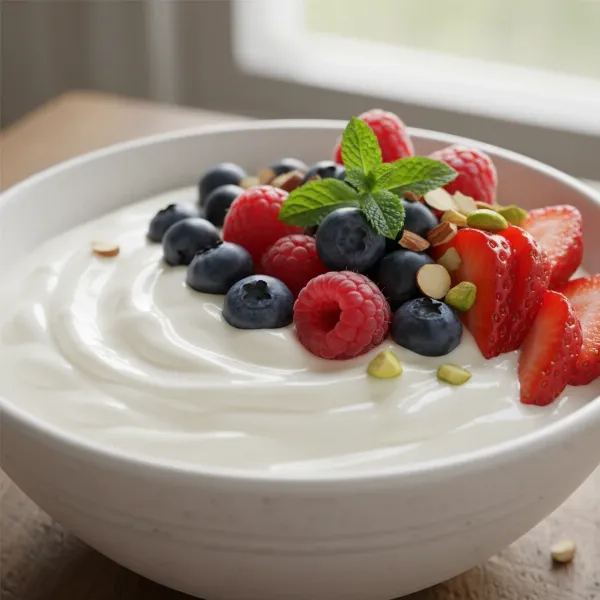 A close-up of a bowl of creamy Icelandic skyr topped with fresh berries, representing its rich texture and healthy appeal.
Gathering Your Skyr-Making Arsenal: Ingredients and Equipment
Before you embark on your skyr-making adventure, ensure you have the necessary components and tools. Starting with quality ingredients and appropriate equipment will set you up for success.
Key Ingredients:
- Milk: Traditionally, skyr is made with skim milk, which contributes to its high-protein, low-fat profile. However, you can experiment with 1%, 2%, or even whole milk for a richer, creamier texture. Opt for pasteurized milk, but avoid ultra-pasteurized varieties if you plan to use rennet, as it can sometimes interfere with coagulation. For some methods, however, ultra-pasteurized milk is considered beneficial for a thicker result even without rennet.
- Skyr Starter Culture: This is crucial for fermentation. You have a few options:
- Store-bought Skyr: A few tablespoons of plain, unflavored skyr with live active cultures (like Siggi’s) can act as your starter.
- Powdered Skyr Culture: Specialized freeze-dried cultures are available online and offer consistent results.
- Rennet (Optional but Recommended): Rennet, an enzyme used in cheesemaking, helps the milk coagulate into a firm curd, which is characteristic of traditional skyr. You can use liquid rennet (typically a few drops per gallon) or a rennet tablet (usually a quarter or half tablet, dissolved in water). While some recipes omit rennet, including it enhances the authentic texture.
Essential Equipment:
- Large Heavy-Bottomed Pot: For heating the milk evenly without scorching.
- Kitchen Thermometer: Absolutely essential for precise temperature control during heating and cooling.
- Whisk or Spoon: For stirring the milk and mixing in the cultures.
- Cheesecloth or Fine-Mesh Strainer: For straining the curds from the whey. Multiple layers of cheesecloth or a high-quality fine-mesh strainer are ideal.
- Colander: To hold the cheesecloth and curds during the straining process.
- Large Bowl: Placed beneath the colander to collect the whey.
- Airtight Containers: For storing your finished skyr in the refrigerator.
 Essential equipment for making skyr at home, including milk, rennet, thermometer, and cheesecloth, laid out on a kitchen counter.
Step-by-Step: The Journey to Homemade Skyr
Creating your own skyr involves several key stages, each vital for the final product’s quality.
- Heat the Milk: Pour your chosen milk into the heavy-bottomed pot. Heat it slowly over medium-low heat, stirring frequently to prevent scorching at the bottom. Aim for a temperature between 180-195°F (82-90°C). Holding it at this temperature for 5-10 minutes can help denature proteins and ensure a thicker set.
- Cool the Milk: Remove the pot from the heat. Allow the milk to cool down to the optimal incubation temperature, usually between 100-115°F (38-46°C). This can take 30 minutes to an hour. Skim off any “skin” that forms on the surface during cooling.
- Prepare and Add the Starter Culture: In a small separate bowl, whisk your starter skyr (or powdered culture) with a few tablespoons of the cooled milk until smooth and lump-free. This tempering step helps activate the cultures gently. Pour this mixture back into the main pot of cooled milk and stir gently but thoroughly to distribute the cultures evenly.
- Add the Rennet (If Using): If using liquid rennet, dissolve 7-9 drops in about 1 tablespoon of cool, non-chlorinated water. If using a tablet, dissolve ¼ to ½ tablet in a small amount of water. Gently stir the diluted rennet into the milk mixture. Be careful not to over-stir, as this can interfere with the rennet’s action.
- Incubate: Cover the pot with a lid and wrap it snugly in a couple of clean towels to insulate it. Place the insulated pot in a warm, draft-free spot. The ideal incubation time ranges from 12 to 24 hours, with many finding 12-16 hours yields excellent results. During this time, the cultures will ferment the milk, and the rennet will help it coagulate into a solid mass. You’ll know it’s ready when you see a thick curd separated from a yellowish liquid (whey).
- Cut the Curds (Optional but Recommended): Once the milk has set, you can gently cut the curds into a grid pattern using a knife. This helps release more whey during straining, leading to a firmer skyr.
- Strain the Skyr: Line a colander with several layers of cheesecloth or a clean muslin cloth, and place it over a large bowl to catch the draining whey. Carefully spoon or pour the curds into the lined colander. Gather the edges of the cheesecloth and tie them together, or simply allow it to sit, letting the whey drip out. The straining process can take anywhere from 2 to 12 hours, or even longer, depending on your desired thickness. For a very thick, almost cheese-like consistency, strain it overnight in the refrigerator.
- Chill and Store: Once your skyr has reached the desired consistency, transfer it from the cheesecloth into an airtight container. Refrigerate immediately. Homemade skyr will typically keep fresh in the refrigerator for about one week.
Achieving Perfection: Tips for Optimal Texture and Flavor
Crafting the perfect batch of homemade skyr is an art refined with practice. Here are some insights to help you achieve your desired results.
- Temperature Precision is Key: Maintaining the correct temperatures during heating, cooling, and incubation is paramount. Too hot or too cold, and your cultures won’t activate properly, or the rennet may not work efficiently. A reliable kitchen thermometer is your best friend.
- Don’t Rush the Cooling: Rapid cooling can sometimes prevent proper denaturing of milk proteins, potentially affecting the final texture. Allow the milk to cool naturally or use a cool water bath for a more controlled descent.
- The Art of Straining: The longer you strain your skyr, the thicker it will become. If you prefer a slightly looser texture, strain for less time. For a super-thick, spoon-standing consistency, extend the straining duration. You can even press it lightly to extract more whey.
- Flavoring Your Skyr: While plain skyr is delicious on its own, it’s also a fantastic canvas for various flavors.
- Sweet Options: Stir in honey, maple syrup, fresh berries, fruit preserves, a sprinkle of cinnamon, or a dash of vanilla paste (avoid extracts as the alcohol can affect the culture).
- Savory Options: Mix with herbs, garlic powder, a pinch of salt, or a drizzle of olive oil for a unique spread or dip.
- Embrace Consistency: For consistent results, try to use the same brand of milk and starter culture each time. Small variations can sometimes lead to different outcomes.
“Making skyr at home gives you unparalleled control over the ingredients and the final texture, allowing for a truly personalized dairy experience.” – Dr. Elara Thorne, Food Scientist specializing in Fermentation
Troubleshooting Common Skyr-Making Hurdles
Even experienced home chefs encounter challenges. Here are solutions to common problems you might face.
- Skyr Didn’t Set (Too Liquid): This is often due to temperature issues. The milk might have been too hot when the cultures were added, killing them, or too cold, preventing them from activating. Ensure your incubation temperature is stable. An inactive starter culture or expired rennet can also be culprits. Try again with fresh ingredients and precise temperature monitoring.
- Grainy or Lumpy Texture: This can happen if the milk was heated too quickly or scorched at the bottom. It can also occur if the cultures weren’t thoroughly whisked into the milk, leading to uneven fermentation. Stirring the milk constantly during heating and properly tempering the starter can help.
- Too Tangy/Sour: Over-incubation can lead to an overly sour taste as the cultures produce more lactic acid. Reduce your incubation time in future batches. The type of starter culture can also influence tanginess.
- Not Thick Enough: If your skyr isn’t as thick as desired, it likely needs more straining time. You can also try using milk with higher protein content or ensure your rennet (if used) is active and properly added. Some find that heating milk to 195°F and holding it for 10 minutes helps create a firmer curd.
Storing Your Homemade Skyr and Utilizing Leftover Whey
Proper storage is essential to enjoy your homemade skyr for as long as possible. Don’t discard the leftover whey; it’s a valuable byproduct!
Once strained to your preferred consistency, transfer your skyr to clean, airtight containers and store it in the refrigerator. It will typically remain fresh for up to one week. Always use a clean spoon when serving to avoid introducing contaminants that could shorten its shelf life.
The liquid drained from your skyr is called whey, and it’s surprisingly versatile and nutritious. It’s rich in protein, vitamins, and minerals. Instead of pouring it down the drain, consider these uses:
- Nutrient-Rich Drink: Drink it chilled on its own or mix it into juices and smoothies for a protein boost.
- Baking Ingredient: Substitute whey for water or milk in bread, pancake, or muffin recipes. It can add a subtle tang and moisture.
- Fertilizer: Diluted whey can be used to water acid-loving plants in your garden.
- Animal Feed: Small amounts can be given to pets as a nutritional supplement.
Why Make Skyr at Home? The Benefits Unveiled
Beyond the satisfaction of creating something delicious from scratch, making skyr at home offers several tangible advantages.
- Cost-Effectiveness: Store-bought skyr can be quite expensive, especially for those who consume it regularly. Producing it at home significantly reduces the cost per serving, making this nutritious food more accessible. A gallon of milk and a bit of starter yield a substantial amount of finished product.
- Customization and Control: When you make skyr yourself, you have complete control over the ingredients. You can choose organic milk, adjust the fat content, and decide precisely what (if any) sweeteners or flavorings to add, avoiding artificial additives and excessive sugars often found in commercial varieties. You also dictate the exact texture, from a softer yogurt-like consistency to an extra-thick, spreadable one.
- Health Benefits: Skyr is naturally high in protein, which promotes satiety and supports muscle health. It’s also a good source of calcium and contains beneficial probiotics that support gut health. Homemade versions ensure you’re getting these benefits without hidden ingredients or preservatives.
- Empowerment and Skill Development: Learning to make skyr connects you to traditional food preparation methods. It’s a culinary skill that can be incredibly empowering and a source of pride, much like baking your own bread or brewing your own kombucha.
Conclusion
Making skyr at home is a fulfilling and surprisingly straightforward process that yields a genuinely delicious and nutritious reward. By understanding the simple ingredients and following a few key steps, you can transform milk into a creamy, high-protein staple that rivals any store-bought option. This journey into Icelandic culinary tradition not only provides a versatile ingredient for your kitchen but also offers the satisfaction of crafting a healthy, customizable food from scratch. So, grab your pot, thermometer, and starter, and prepare to elevate your home dairy game. What delicious creations will you whip up with your first homemade batch of skyr?
Frequently Asked Questions
Do I absolutely need rennet to make skyr?
While some recipes suggest rennet is optional, traditional skyr benefits significantly from its inclusion. Rennet helps the milk coagulate more effectively, resulting in the characteristic thick, firm curd that gives skyr its unique texture, making it distinct from regular yogurt.
Can I use plant-based milk to make skyr?
Skyr’s traditional preparation relies on dairy milk proteins to form its structure. While some plant-based yogurts exist, replicating the exact texture and fermentation of dairy skyr with non-dairy milks (like almond or soy milk) can be challenging due to differences in protein and sugar composition. Experimentation may be required.
What is the ideal temperature for incubating skyr?
The optimal incubation temperature for skyr cultures typically ranges between 100-115°F (38-46°C). Maintaining a stable temperature within this range is critical for the active cultures to thrive and properly ferment the milk, leading to a successful and firm set.
How long does homemade skyr last in the refrigerator?
When stored in an airtight container in the refrigerator, freshly made homemade skyr generally maintains its quality for up to one week. Always rely on visual cues and smell to determine freshness, and discard if any signs of spoilage appear.
Can I reuse whey from making skyr?
Absolutely! The whey separated from skyr is a nutritious byproduct rich in protein and beneficial acids. It can be used in smoothies, as a liquid in baking (like for bread or pancakes), or even as a starter for fermenting vegetables, offering a versatile ingredient rather than waste.