Crafting homemade yogurt is a rewarding experience, offering fresh, probiotic-rich goodness right from your kitchen. However, achieving that ideal texture and tangy flavor often hinges on one critical factor: incubation temperature. The debate between 110F and 115F for yogurt incubation is a common one among home fermenters, each promising distinct results. Understanding the science behind these subtle differences is key to unlocking your perfect yogurt.
Understanding Yogurt Incubation: The Role of Temperature
At its heart, yogurt making is a delicate dance between milk and live bacterial cultures. When introduced to milk, these beneficial bacteria, primarily Lactobacillus bulgaricus and Streptococcus thermophilus, get to work. They consume the lactose (milk sugar), converting it into lactic acid. This increase in acidity causes the milk proteins to coagulate and thicken, transforming liquid milk into the creamy, custardy texture we know as yogurt.
Temperature is paramount in this process because it directly influences the activity level and metabolic rate of these bacteria. Each strain has an optimal temperature range where it thrives, multiplying efficiently and producing lactic acid at a steady pace. Deviating too far from this ideal can either slow down fermentation to a crawl, leading to failure, or accelerate it too quickly, potentially compromising texture and flavor, or even killing off the cultures. Maintaining a stable, consistent temperature throughout incubation is arguably more important than the precise degree, as fluctuations can stress the cultures and result in an inconsistent product.
 Microscope view of bacteria consuming lactose in milk, influenced by temperature for yogurt fermentation.
110F vs. 115F: A Deep Dive into Incubation Temperatures
The seemingly small difference between 110F and 115F can lead to noticeable variations in your final yogurt. Both temperatures fall within the thermophilic range favored by most yogurt cultures, but they each offer distinct advantages and potential drawbacks, influencing fermentation speed, texture, and taste.
The Case for 110F: Smoothness and Stability
|
Our Picks for the Best Yogurt maker in 2026
As an Amazon Associate I earn from qualifying purchases.
|
||
| Num | Product | Action |
|---|---|---|
| 1 | Yogurt Maker, Compact Greek Yogurt Maker Machine with Constant Temperature Control, Stainless Steel Container, 1 Quart for Home Organic Yogurt |

|
| 2 | Yogurt Dehydrator, Small-Batch Greek Yogurt Maker with Built-In Date Reminder Fresh, Simple & Just the Right Amount — Food-Grade BPA-Free Materials |
|
| 3 | Euro Cuisine Yogurt Maker - YMX650 Automatic Digital Yogurt Maker Machine with Set Temperature - Includes 7-6 oz. Reusable Glass Jars and 7 Rotary Date Setting Lids for Instant Storage |
|
| 4 | Ultimate Probiotic Yogurt Maker with Adjustable Time & Temp Control - Make Trillions of Live Probiotics with Two 1-Quart Containers for Larger Batches - Greek Yogurt Maker - ULTIMATE LIFETIME WARRANTY |
|
| 5 | GDOR Yogurt Maker with Adjustable Temp & Timer– Probiotic-Rich – Digital Greek Yogurt Machine with 8×6oz BPA-Free Glass Jars, Easy to Use for Home, Stainless Steel |
|
| 6 | Yogurt Maker Machine, 8 Glass Jars with Lids Reusable for Yoghurt, Oatmeal, Pudding, or Jello, Food-Grade Martial, One-touch Control, Homemade Yogurt |
|
| 7 | Easy Yogurt Maker for Perfect Homemade Yogurt, 1.7 QT Electric Fermenter for Greek Yogurt, Rice Wine, Natto, with Digital Control & Auto Keep Warm, BPA-Free Container |
|
| 8 | Euro Cuisine YM80 Electric Yogurt Maker Machine- Promote Gut Health with Probiotic Rich Homemade Yogurt -Home Yogurt Incubator with Glass Jars, White |
|
| 9 | Yogurt Maker with Adjustable Temperature & Time Control, Probiotic Yogurt Maker Machine with 8 Glass Jars, Automatic Shut-Off for Homemade Probiotic Yogurt, Promoting Gut Health(48OZ) |
|
| 10 | Yogurt Maker with Two Containers, Yogurt Maker Machine with Adjustable Temperature & Time Control, Automatic Shut-Off & Constant Temper for Homemade Probiotic Yogurt, Promoting Gut Health |
|
Incubating yogurt at around 110F (43°C) is often cited as the sweet spot for achieving a smooth, consistent texture with minimal whey separation. Many experienced yogurt makers find that this slightly lower temperature allows the milk proteins to set more gently, forming a stable curd that is less prone to graininess or lumpiness. This approach tends to produce a milder-tasting yogurt, as the fermentation process is slower, developing tanginess at a more controlled rate. If you prefer a less tart, more subtly flavored yogurt that holds its structure beautifully, 110F is an excellent choice. It’s also often recommended for those seeking a highly stable curd that resists breaking down during handling or chilling.
The Case for 115F: Speed and Tang
Opting for 115F (46°C) can significantly speed up the fermentation process. At this slightly warmer temperature, the yogurt cultures are more active, multiplying and producing lactic acid at a faster rate. This can be beneficial when time is a factor, potentially reducing incubation time by an hour or two compared to 110F. The accelerated fermentation often results in a tangier yogurt, as more lactic acid is produced in a shorter period. If you enjoy a distinct, sharp yogurt flavor, 115F might be your preferred temperature. However, this higher activity level also comes with caveats. There’s an increased risk of over-fermentation, which can lead to a grainier texture or excessive whey separation if the yogurt is left for too long. Ensuring precise temperature control is crucial at 115F to prevent damaging the delicate bacterial cultures, which can be sensitive to temperatures much beyond this point.
Factors Influencing Your Ideal Incubation Temperature
Choosing between 110F and 115F isn’t a one-size-fits-all decision; it depends on several factors, including your personal preferences and the specific ingredients you’re using.
Your Desired Yogurt Texture and Flavor
Do you crave a creamy, almost custard-like yogurt with a gentle tang, or do you prefer a firm, intensely tart experience?
- For a milder flavor and smoother texture, leaning towards the 105-110F range is generally recommended. This allows for a slower, more controlled fermentation, yielding a less acidic and more delicate product.
- For a tangier profile and potentially faster set, 115F might be more suitable. Just be vigilant to avoid over-fermentation, which can lead to graininess.
The Type of Starter Culture
Different starter cultures, whether store-bought yogurt with live active cultures or freeze-dried cultures, can have varying optimal temperature ranges. Some specific strains of bacteria might prefer the lower end of the thermophilic range, while others thrive at slightly higher temperatures. Always check the recommendations provided with your specific starter culture, as this can offer the most accurate guidance for successful fermentation. Using a fresh and active starter is critical regardless of temperature; a weak starter will struggle even in ideal conditions.
Your Incubation Method
The equipment you use to incubate your yogurt plays a significant role in how well you can maintain a stable temperature.
- Yogurt makers are designed to hold a consistent temperature, often within a programmed range, simplifying the process.
- Instant Pots with a “yogurt” setting typically maintain a precise temperature, offering reliability.
- Oven with light on, slow cookers on “warm,” or insulated coolers with hot water are common DIY methods. These require more attention to ensure the temperature doesn’t fluctuate too much. Consistent heat is far more important than the exact initial temperature when adding the starter.
Probiotic Potency
While both 110F and 115F support the growth of beneficial bacteria, some research suggests that lower temperatures (e.g., 96-107°F / 36-42°C), combined with longer fermentation times (up to 24 hours or more), can result in a yogurt with a higher concentration of probiotics and reduced lactose content, which is beneficial for specific dietary needs like SCD and GAPS diets. If maximizing probiotic count is your priority, you might explore the lower end of the incubation spectrum or specific culture blends optimized for extended, lower-temperature fermentation.
Achieving and Maintaining the Perfect Temperature
Precision is crucial when it comes to yogurt incubation. Even a few degrees off can significantly impact your results.
Essential Tools: Thermometers
A reliable thermometer is your best friend in homemade yogurt making. A good quality quick-read thermometer is indispensable for:
- Cooling milk: Ensuring your milk has cooled to the target incubation temperature before adding the starter. Adding starter to milk that’s too hot will kill the cultures.
- Checking incubation temperature: Periodically verifying that your incubation method is consistently holding the desired temperature. Slight dips or spikes can be common, and a thermometer helps you make adjustments.
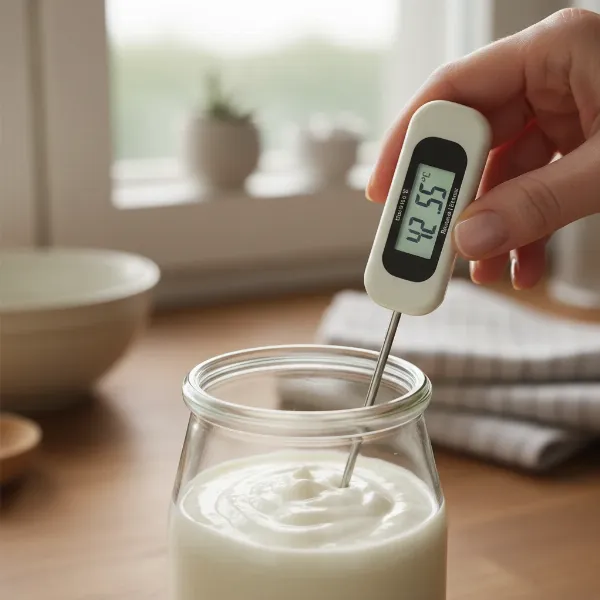 Hand holding a quick-read thermometer checking the temperature of homemade yogurt in a glass jar.
Tips for Temperature Stability
- Preheat your incubation environment: If using an oven with the light on or a cooler, preheat it to your target temperature before placing your yogurt mixture inside.
- Insulate: For methods like coolers or simply leaving jars on the counter, wrap your containers in towels or blankets to help maintain warmth.
- Avoid jostling: Moving or disturbing the yogurt during incubation can disrupt the delicate protein mesh, leading to a runny or broken set.
- Calibrate your equipment: If using a Yogurt Maker or Instant Pot, periodically check its internal temperature with your own thermometer to ensure accuracy.
“The subtle difference between 110F and 115F might seem insignificant, but it’s where the art and science of yogurt making truly meet. Experimentation within this narrow window allows you to fine-tune your yogurt to perfection.”
Conclusion
The choice between 110F and 115F for yogurt incubation is a nuanced one, with each temperature offering unique benefits for your homemade batches. While 110F often delivers a consistently smooth texture and milder flavor, ideal for those seeking a gentle, creamy yogurt, 115F can accelerate fermentation, resulting in a tangier product—though it requires closer monitoring to prevent textural issues. Ultimately, the “perfect” temperature is a personal preference, influenced by your desired taste, texture, starter culture, and incubation method.
Embrace experimentation in your kitchen. Start with a recommended temperature, pay close attention to the results, and don’t be afraid to adjust slightly in subsequent batches. With a reliable thermometer and consistent practice, you’ll soon discover the precise incubation temperature that yields your ideal homemade yogurt every time. What will your next batch be: smooth and mild or wonderfully tart?
Frequently Asked Questions
What happens if my yogurt incubates at too low a temperature?
If the incubation temperature is too low (e.g., below 100F), the yogurt cultures will become sluggish or dormant, significantly slowing down or even completely halting the fermentation process. This can result in milk that never thickens into yogurt or takes an excessively long time to set, and may not develop the desired flavor or probiotic benefits.
Can I mix yogurt cultures with milk that is hotter than 115F?
No, it is crucial to allow your milk to cool to the target incubation temperature (typically 105-115F) before adding your starter culture. Temperatures significantly higher than 115F can kill the delicate live bacteria in your starter, rendering them inactive and preventing your yogurt from fermenting. Always use a thermometer to ensure the milk is within the safe range.
Does a longer incubation time at 110F produce the same result as a shorter time at 115F?
Not exactly. While both can lead to set yogurt, the flavor and texture profiles may differ. Longer incubation at 110F will generally produce a milder, smoother yogurt with a more controlled development of tang. Shorter incubation at 115F will yield a tangier yogurt due to faster acid production, but it might have a slightly different texture and a higher risk of graininess if not carefully monitored.
How do I know when my yogurt is ready?
Yogurt is typically ready when it has set and appears firm. You can gently tilt the incubation jar; if it moves as a solid mass without liquid pooling too much, it’s likely set. Taste is also a key indicator; stop incubation when the yogurt reaches your desired level of tanginess. It will thicken further as it chills in the refrigerator.