Embarking on the journey of homemade yogurt opens up a world of culinary possibilities, allowing you to craft a wholesome, probiotic-rich food right in your kitchen. While plain yogurt offers undeniable health benefits, its tangy profile can be a surprise for those accustomed to store-bought, sweetened varieties. The good news? You can transform that simple tang into a symphony of flavors without relying on a single gram of added sugar. This guide will explore innovative and delicious ways to naturally enhance your homemade yogurt, ensuring every spoonful is both nutritious and satisfying.
Elevate Your Homemade Yogurt: A Guide to Sugar-Free Flavoring
Making yogurt at home offers unparalleled control over ingredients, ensuring you avoid the artificial additives and excessive sugars often found in commercial products. Plain homemade yogurt is a powerhouse of beneficial nutrients, including protein, calcium, and gut-supporting probiotics. It’s crucial to distinguish between naturally occurring sugars, like those found in fruit, and “added sugars,” which are sweeteners intentionally incorporated during processing. Our focus here is to leverage ingredients that bring sweetness and depth purely from their inherent composition, keeping your yogurt genuinely sugar-free.
Mastering Flavor Profiles: Key Categories for Sugar-Free Additions
|
Our Picks for the Best Yogurt maker in 2026
As an Amazon Associate I earn from qualifying purchases.
|
||
| Num | Product | Action |
|---|---|---|
| 1 | Yogurt Maker with Adjustable Temperature & Time Control, Probiotic Yogurt Maker Machine with 8 Glass Jars, Automatic Shut-Off for Homemade Probiotic Yogurt, Promoting Gut Health(48OZ) |

|
| 2 | Yogurt Maker, Compact Greek Yogurt Maker Machine with Constant Temperature Control, Stainless Steel Container, 1 Quart for Home Organic Yogurt |
|
| 3 | Euro Cuisine Yogurt Maker - YMX650 Automatic Digital Yogurt Maker Machine with Set Temperature - Includes 7-6 oz. Reusable Glass Jars and 7 Rotary Date Setting Lids for Instant Storage |
|
| 4 | Yogurt Dehydrator, Small-Batch Greek Yogurt Maker with Built-In Date Reminder Fresh, Simple & Just the Right Amount — Food-Grade BPA-Free Materials |
|
| 5 | Euro Cuisine YM80 Electric Yogurt Maker Machine- Promote Gut Health with Probiotic Rich Homemade Yogurt -Home Yogurt Incubator with Glass Jars, White |
|
| 6 | GDOR Yogurt Maker with Adjustable Temp & Timer– Probiotic-Rich – Digital Greek Yogurt Machine with 8×6oz BPA-Free Glass Jars, Easy to Use for Home, Stainless Steel |
|
| 7 | Yogurt Maker with Two Containers, Yogurt Maker Machine with Adjustable Temperature & Time Control, Automatic Shut-Off & Constant Temper for Homemade Probiotic Yogurt, Promoting Gut Health |
|
| 8 | Ultimate Probiotic Yogurt Maker with Adjustable Time & Temp Control - Make Trillions of Live Probiotics with Two 1-Quart Containers for Larger Batches - Greek Yogurt Maker - ULTIMATE LIFETIME WARRANTY |
|
| 9 | Yogurt Maker Machine, 8 Glass Jars with Lids Reusable for Yoghurt, Oatmeal, Pudding, or Jello, Food-Grade Martial, One-touch Control, Homemade Yogurt |
|
| 10 |
|
|
Transforming plain yogurt into a delightful treat without added sugar is an art form that relies on understanding and combining natural ingredients. Here are the primary categories to explore, each offering unique textures and tastes.
1. Fresh and Frozen Fruits: Nature’s Sweeteners
Fruits are your best friend when it comes to sweetening yogurt naturally. Their inherent sugars, coupled with fiber and vitamins, make them an ideal choice.
- Berries (Strawberries, Blueberries, Raspberries): These antioxidant-rich powerhouses offer a lower sugar content compared to many other fruits while delivering vibrant flavors. Mash them directly into your yogurt for a rustic texture, or gently cook them down into a quick, sugar-free compote.
- Tropical Fruits (Mango, Pineapple, Kiwi): For an exotic twist, incorporate ripe mango, pineapple, or kiwi. These fruits are naturally very sweet and can add a delightful tang. Dice them finely for a chunky mix or blend them into a smooth puree.
- Bananas: Super ripe bananas are incredibly sweet and contribute a wonderful creamy texture to yogurt. Mash a small portion into your bowl for a natural sweetness boost. Remember that bananas are denser in natural sugars, so a little goes a long way.
Preparation Tips: For the most intense flavor and sweetness, always opt for very ripe fruits. You can dice fresh fruits into small pieces, mash softer fruits like berries or bananas, or puree them in a blender for a smooth, sauce-like consistency. To make a simple, sugar-free fruit compote, gently simmer diced fruit (e.g., berries, peaches) with a splash of water until softened, then cool before mixing into your yogurt.
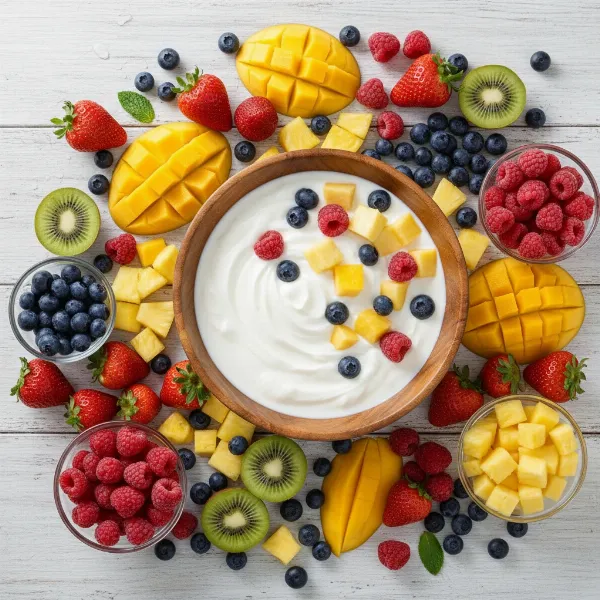 A vibrant assortment of fresh and frozen fruits like berries, mango, and kiwi, perfect for naturally flavoring homemade yogurt.
2. Spices and Extracts: Aromatic Enhancements
Beyond sweetness, extracts and spices can profoundly alter the flavor profile of your yogurt, adding warmth, depth, or a refreshing kick without any sugar.
- Vanilla Extract: This classic flavoring is a versatile staple. A few drops of pure vanilla extract can mellow the tang of plain yogurt and impart a comforting, familiar sweetness perception.
- Cinnamon: Known for its warm, slightly sweet notes, cinnamon is a perfect addition. A simple sprinkle can elevate your yogurt, particularly when paired with fruits like applesauce (no added sugar) or pumpkin puree.
- Other Extracts: Experiment with other extracts like almond for a nutty depth, coconut for a tropical vibe, mint for a refreshing sensation, or orange for a zesty burst. A tiny amount is often all you need.
- Spice Blends: Explore pre-made or homemade spice blends like pumpkin pie spice or chai spice for a more complex, aromatic experience. These are excellent choices for seasonal variations.
How to Use: Start with just a few drops of extract or a pinch of spice, then taste and adjust. These concentrated flavors can easily overpower the yogurt if used excessively.
3. Vegetable Purees: Unexpected Sweetness and Nutrients
While less conventional, certain vegetable purees can add a surprising depth of flavor, natural sweetness, and a boost of nutrients to your yogurt.
- Pumpkin Puree: Unsweetened pumpkin puree offers an earthy, mildly sweet flavor that pairs beautifully with cinnamon, nutmeg, or pumpkin pie spice. It also adds a lovely creamy texture and a dose of Vitamin A.
- Sweet Potato Puree: Similar to pumpkin, cooked and pureed sweet potato provides a gentle sweetness and smooth texture. It’s a fantastic base for a nutritious and uniquely flavored yogurt.
Usage: Ensure you use unsweetened, plain purees. Simply blend the puree into your yogurt until well combined. These can be enjoyed cold or even slightly warmed for a comforting treat.
4. Nuts and Seeds: Texture and Richness
While not directly providing sweetness, nuts and seeds are invaluable for adding crunch, healthy fats, and a rich mouthfeel, making your sugar-free yogurt more satisfying.
- Chopped Nuts: Almonds, walnuts, pecans, or cashews offer a delightful textural contrast and a boost of protein and healthy fats. Lightly toast them for enhanced flavor.
- Seeds: Chia seeds or ground flax seeds can be stirred in for added fiber and nutrients. Chia seeds will also absorb liquid and create a thicker, pudding-like consistency over time.
- Nut Butters: A spoonful of unsweetened almond butter, peanut butter, or cashew butter can add richness and a creamy, nutty flavor. Always check labels to ensure there is no added sugar or oils.
Creative Combinations and Recipes for Sugar-Free Yogurt
The real fun begins when you start combining these elements to create your own signature sugar-free yogurt flavors.
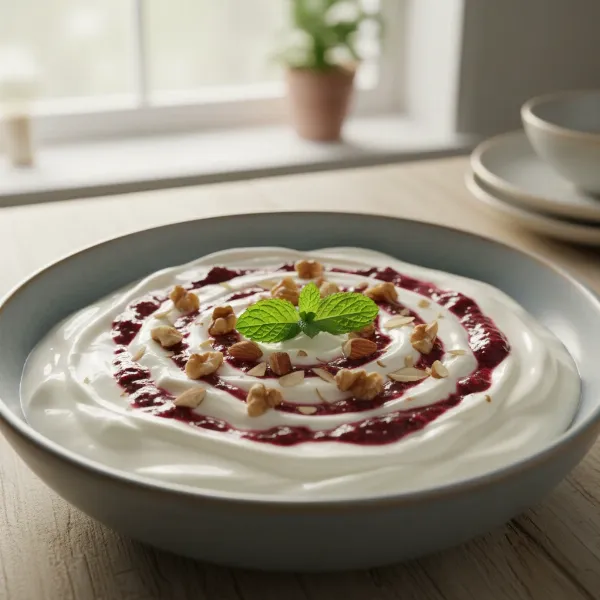 A beautifully presented bowl of homemade, sugar-free yogurt, artfully garnished with fresh berries and chopped nuts.
- Berry Vanilla Swirl: Combine a handful of mashed mixed berries with a few drops of vanilla extract. Swirl into plain yogurt for a classic, fruity delight.
- Tropical Paradise: Blend unsweetened mango puree with a hint of coconut extract and top with a sprinkle of shredded coconut (unsweetened) for a taste of the tropics.
- Autumn Spice Delight: Mix unsweetened pumpkin puree with a generous pinch of cinnamon and a dash of ginger. This creates a cozy, spiced yogurt perfect for cooler weather.
- Nutty Banana Blend: Mash half a ripe banana with a tablespoon of unsweetened almond butter and mix into yogurt. Top with a sprinkle of chopped walnuts for extra crunch and healthy fats.
- Lemon Poppy Seed: Stir in a teaspoon of fresh lemon zest and a pinch of poppy seeds for a bright, refreshing, and textured experience.
Tips for Success and Troubleshooting
Crafting delicious, sugar-free yogurt flavors is straightforward with a few key considerations:
- Ripe Ingredients Are Key: The riper your fruits, the more natural sweetness they will impart, reducing any perceived tartness from the yogurt.
- Start Small and Taste: When adding extracts or strong spices, begin with a small amount (e.g., 1/4 teaspoon extract, a tiny pinch of spice) and gradually add more until you reach your desired flavor intensity.
- Consider Texture: Think about how different additions will affect the yogurt’s consistency. Purees will make it smoother, while diced fruits, nuts, and seeds add chewiness and crunch. Adjust your yogurt’s thickness with a splash of milk or water if it becomes too dense.
- Storage: Naturally flavored yogurt typically stores well in an airtight container in the refrigerator for 3-5 days. For best freshness and texture, add very delicate fruits or crunchy toppings just before serving.
“The beauty of homemade yogurt lies in its versatility. By focusing on whole, unprocessed ingredients, you unlock a spectrum of natural flavors that truly nourish your body without compromise.” – Dr. Elena Petrova, Nutritional Scientist.
Where to Find Quality Ingredients for Sugar-Free Flavoring
Sourcing high-quality ingredients is fundamental to making truly delicious and healthy sugar-free yogurt.
- Fresh Produce Markets: Local farmers’ markets and grocery stores are ideal for ripe, seasonal fruits and fresh spices.
- Bulk Spice Stores: For a wider variety of extracts and spices, check out specialty spice shops or the bulk section of health food stores.
- Read Labels Diligently: When purchasing extracts, unsweetened fruit purees (like applesauce or pumpkin puree), or nut butters, always scrutinize the ingredient list to ensure there are absolutely no added sugars, artificial sweeteners, or unwanted additives. “No sugar added” on the label is a good indicator, but a quick check of the ingredients confirms it.
By following these guidelines, you can confidently transform your plain homemade yogurt into a personalized, healthy, and incredibly flavorful experience.
Frequently Asked Questions
What are the best fruits to use for sugar-free yogurt flavoring?
The best fruits are those naturally rich in sweetness and flavor, such as ripe berries (strawberries, blueberries, raspberries), tropical fruits like mango and pineapple, and very ripe bananas. These offer significant natural sugars, fiber, and nutrients without needing any added sweeteners.
Can I use frozen fruits to flavor homemade yogurt?
Absolutely! Frozen fruits are an excellent option. They can be thawed and mashed, or gently simmered to create a quick, sugar-free compote. Blending frozen fruit directly into yogurt can also create a thicker, smoothie-like consistency, ideal for a refreshing treat.
How do I make sure my homemade fruit compote has no added sugar?
To ensure your homemade fruit compote is sugar-free, simply simmer your chosen diced fruit (e.g., berries, peaches) with a small amount of water or a splash of fresh fruit juice (like apple juice, ensuring it’s 100% juice with no added sugars) until the fruit softens and releases its natural sweetness. No other sweeteners are needed.
Are there any savory options for plain yogurt without added sugar?
Yes, plain yogurt is incredibly versatile for savory applications without added sugar. Consider mixing in fresh herbs like dill or chives, a pinch of garlic powder, onion powder, or a dash of black pepper. You can also add a spoonful of unsweetened vegetable purees such as roasted red pepper puree or a tiny bit of tomato paste for a unique savory twist.
How long can I store flavored homemade yogurt?
Flavored homemade yogurt, particularly when mixed with fresh fruits or other perishable ingredients, should be stored in an airtight container in the refrigerator and is best consumed within 3-5 days. For optimal freshness and texture, it’s often best to flavor individual servings just before eating.