Embarking on the journey of homemade soy milk yogurt is a rewarding experience, transforming simple ingredients into a probiotic-rich, creamy delight. If you’ve been searching for a healthy, customizable, and additive-free alternative to store-bought options, your electric yogurt maker is about to become your new best friend. This comprehensive guide will walk you through everything you need to know, from selecting the right ingredients to mastering the fermentation process, ensuring you whip up perfect batches of soy milk yogurt every time.
Your Essential Guide to Making Soy Milk Yogurt
Making your own soy milk yogurt at home offers unparalleled control over ingredients, allowing you to avoid unwanted sugars, thickeners, and preservatives commonly found in commercial products. It’s also a cost-effective way to enjoy a continuous supply of this versatile plant-based staple.
Key Ingredients for Homemade Soy Milk Yogurt
Success starts with quality ingredients. For delicious soy milk yogurt, you’ll need just two primary components, with an optional third for enhanced texture:
- Unsweetened Soy Milk: This is the foundation of your yogurt. Crucially, choose a brand that lists only two ingredients: soybeans and water. Avoid soy milks with added sugars, oils, gums, or stabilizers, as these can interfere with the fermentation process and result in a thinner, less consistent yogurt. Brands like EdenSoy and Trader Joe’s Unsweetened Soymilk are often recommended for their purity and creamy texture.
- Vegan Probiotic Capsules or Yogurt Starter:
- For your first batch: Vegan probiotic capsules act as your starter culture. Look for capsules containing at least 12 billion CFUs (colony-forming units) of beneficial bacteria. Empty the powder directly into your soy milk.
- For subsequent batches: Once you’ve successfully made your first batch, simply reserve about ½ cup of your homemade yogurt to use as a starter for the next one. This not only saves you money but also often leads to an even creamier consistency and tangier flavor over time.
- Cornstarch (Optional, for Thicker Yogurt): Some recipes recommend adding a small amount of cornstarch (e.g., 3 tablespoons per 32 oz of soy milk) to achieve a thicker consistency, similar to traditional dairy yogurt. This is particularly useful if your soy milk is on the thinner side or you desire a Greek-style yogurt.
|
Our Picks for the Best Yogurt maker in 2026
As an Amazon Associate I earn from qualifying purchases.
|
||
| Num | Product | Action |
|---|---|---|
| 1 | Ultimate Probiotic Yogurt Maker with Adjustable Time & Temp Control - Make Trillions of Live Probiotics with Two 1-Quart Containers for Larger Batches - Greek Yogurt Maker - ULTIMATE LIFETIME WARRANTY |

|
| 2 | Yogurt Maker Machine, 8 Glass Jars with Lids Reusable for Yoghurt, Oatmeal, Pudding, or Jello, Food-Grade Martial, One-touch Control, Homemade Yogurt |
|
| 3 | GDOR Yogurt Maker with Adjustable Temp & Timer– Probiotic-Rich – Digital Greek Yogurt Machine with 8×6oz BPA-Free Glass Jars, Easy to Use for Home, Stainless Steel |
|
| 4 | Euro Cuisine YM80 Electric Yogurt Maker Machine- Promote Gut Health with Probiotic Rich Homemade Yogurt -Home Yogurt Incubator with Glass Jars, White |
|
| 5 | Easy Yogurt Maker for Perfect Homemade Yogurt, 1.7 QT Electric Fermenter for Greek Yogurt, Rice Wine, Natto, with Digital Control & Auto Keep Warm, BPA-Free Container |
|
| 6 | Yogurt Maker with Adjustable Temperature & Time Control, Probiotic Yogurt Maker Machine with 8 Glass Jars, Automatic Shut-Off for Homemade Probiotic Yogurt, Promoting Gut Health(48OZ) |
|
| 7 | Euro Cuisine Yogurt Maker - YMX650 Automatic Digital Yogurt Maker Machine with Set Temperature - Includes 7-6 oz. Reusable Glass Jars and 7 Rotary Date Setting Lids for Instant Storage |
|
| 8 | Yogurt Maker, Compact Greek Yogurt Maker Machine with Constant Temperature Control, Stainless Steel Container, 1 Quart for Home Organic Yogurt |
|
| 9 | Yogurt Dehydrator, Small-Batch Greek Yogurt Maker with Built-In Date Reminder Fresh, Simple & Just the Right Amount — Food-Grade BPA-Free Materials |
|
| 10 | Yogurt Maker with Two Containers, Yogurt Maker Machine with Adjustable Temperature & Time Control, Automatic Shut-Off & Constant Temper for Homemade Probiotic Yogurt, Promoting Gut Health |
|
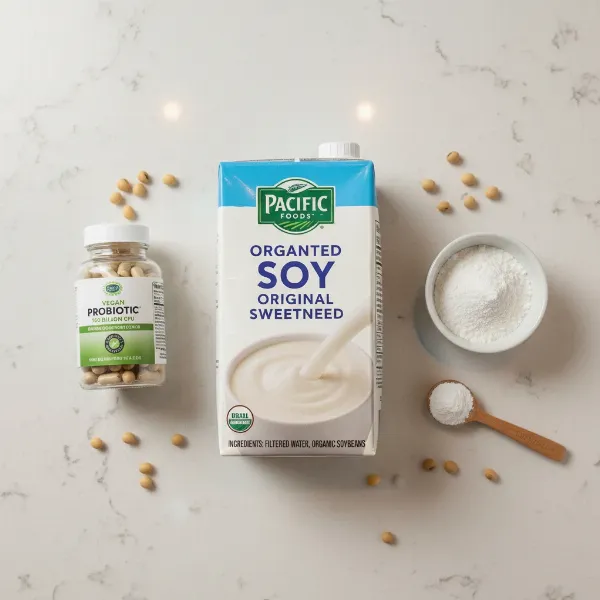 Essential ingredients for making homemade soy milk yogurt, including pure soy milk and probiotic capsules.
Step-by-Step: Making Soy Milk Yogurt in an Electric Maker
Your electric yogurt maker provides the consistent low heat essential for the probiotic cultures to thrive. Here’s how to use it effectively:
- Prepare Your Soy Milk (if using cornstarch or non-sealed milk):
- If you’re adding cornstarch for thickness, or if your soy milk isn’t from a brand-new sealed carton (which might require pre-heating to sterilize), gently heat 2 cups of unsweetened soy milk in a saucepan over medium-low heat until it’s just below boiling.
- In a separate bowl, whisk 1/2 cup of cold soy milk with 3 tablespoons of cornstarch until smooth.
- Once the milk in the saucepan is steaming, whisk in the cornstarch mixture. Continue to heat to just boiling, then lower the heat and whisk until it thickens slightly.
- Remove from heat and whisk in the remaining soy milk (if applicable), allowing the temperature to cool to approximately 110-115°F (43-46°C). This temperature is crucial; too hot will kill the cultures, too cold will hinder fermentation.
- If using a new, sealed carton of pure soy milk without cornstarch, you can often skip the heating step.
- Add Your Starter:
- Once your soy milk mixture is at the ideal temperature (around 110-115°F), gently whisk in your starter. If using probiotic capsules, carefully open them and pour the powder into the milk, whisking thoroughly to ensure even distribution. If using a previous batch of homemade yogurt as a starter, add about ½ cup per 32 ounces of soy milk.
- Fill Yogurt Maker Jars:
- Carefully pour the soy milk and starter mixture into the individual jars that come with your electric yogurt maker. Fill them to just below the rim.
- Incubate in the Yogurt Maker:
- Place the filled jars into your electric yogurt maker. Most electric yogurt makers provide a consistent temperature ideal for fermentation.
- Set the timer for 12 to 15 hours. The exact time depends on your desired tanginess and thickness. A longer fermentation generally results in a tangier flavor and potentially more probiotics. Some yogurt makers allow temperature adjustment; aim for 112°F (44°C).
- Check Consistency:
- After the incubation period, gently check the yogurt. It should be thickened and have a slightly tangy aroma.
- Chill and Set:
- Remove the jars from the yogurt maker. If your maker’s instructions suggest, place lids on the jars. Transfer them to the refrigerator and chill for at least 2 to 3 hours. This chilling period is essential for the yogurt to fully set and firm up.
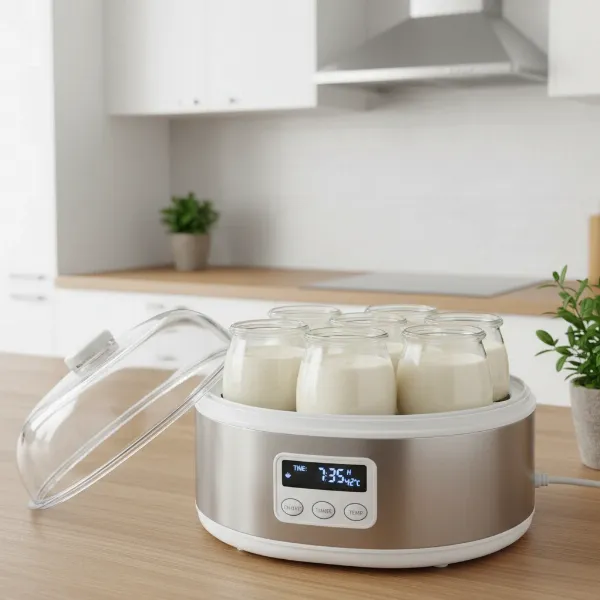 Glass jars filled with soy milk yogurt incubating inside an electric yogurt maker.
“Making your own soy milk yogurt is not just about avoiding additives; it’s about connecting with your food and tailoring it precisely to your taste and health needs.” – Nisha Melvani, RDN, Culinary Expert
Troubleshooting Common Soy Yogurt Issues
Even with the right steps, occasional hiccups can occur. Here’s how to address common problems:
- Yogurt is Too Thin/Watery:
- Soy Milk Quality: Ensure your soy milk contains only soybeans and water, without any added gums or stabilizers. These additives can inhibit thickening.
- Starter Potency: Your probiotic capsules might be old or less potent. Always check expiration dates and store probiotics properly. If using a previous batch as a starter, ensure it’s still fresh (within 7-10 days).
- Temperature: The incubation temperature might have been too low (slowing fermentation) or too high (killing the cultures).
- Fermentation Time: Not enough incubation time can result in thin yogurt. Try extending the time by a few hours in your next batch.
- Adding Cornstarch: If consistently getting thin results, consider incorporating the cornstarch method described above.
- Yogurt is Too Tangy or Curdled:
- Over-fermentation: This usually means the yogurt fermented for too long. Reduce the incubation time in your next batch.
- Starter Quantity: Too much starter can also lead to excessive tanginess and separation.
- Yogurt Has an “Off” Smell or Taste:
- Sterilization: Ensure all your equipment (jars, spoons, bowls) are thoroughly clean and sterilized to prevent unwanted bacterial growth.
- Expired Ingredients: Double-check the expiration dates of your soy milk and starter.
Expert Tips for Perfect Soy Milk Yogurt
- Soy Milk Purity is Key: This cannot be stressed enough. The fewer ingredients in your soy milk, the better your yogurt will turn out.
- Consistent Temperature: An electric yogurt maker is excellent for maintaining the precise temperature (110-115°F) needed for successful fermentation. If your maker doesn’t have a temperature setting, ensure it keeps a steady warmth.
- Don’t Stir During Fermentation: Once the soy milk and starter are combined and placed in the yogurt maker, resist the urge to stir until the process is complete.
- Save a Starter: Always remember to save ½ cup of your fresh, homemade yogurt to use as a starter for your next batch. This creates a continuous, self-sustaining cycle.
- Chill Thoroughly: Allow ample chilling time (at least 2-3 hours) in the refrigerator. This not only enhances the texture but also halts the fermentation process, preventing over-tanginess.
- Batch Tip: Consider making a larger batch if your yogurt maker allows, as homemade soy yogurt stores well in the fridge for up to a week.
- Flavor After Fermentation: If you want to add sweeteners or flavorings like vanilla extract, mix them in after the yogurt has fermented and chilled. Alcohol-based extracts, especially in large amounts, can inhibit bacterial growth if added prematurely.
Enjoying Your Homemade Soy Milk Yogurt
Once chilled, your homemade soy milk yogurt is ready to be enjoyed! It’s incredibly versatile:
- Breakfast Bowls: Top with fresh berries, granola, nuts, or a drizzle of maple syrup.
- Smoothies: Blend into your favorite fruit and vegetable smoothies for a creamy, probiotic boost.
- Dressings and Sauces: Use as a base for creamy salad dressings, dips like vegan tzatziki, or tangy sauces for savory dishes.
- Baking: Incorporate it into baking recipes to add moisture and a subtle tang.
- Greek-Style Yogurt: For an extra thick consistency, line a colander with a few layers of cheesecloth and let the yogurt drain in the refrigerator overnight to remove excess whey.
Where to Buy a Reliable Electric Yogurt Maker
Electric yogurt makers are widely available both online and in brick-and-mortar stores.
- Online Retailers: Amazon, Walmart, Target, and specialty kitchen appliance websites often carry a wide selection of brands and models, such as Euro Cuisine and Cuisinart. Read user reviews to gauge performance and reliability.
- Department Stores & Home Goods Stores: Check the kitchen appliance sections of major department stores like Macy’s, Kohl’s, or dedicated kitchenware stores.
- Health Food Stores: Some health-focused stores might also stock yogurt makers, particularly those catering to plant-based or DIY food enthusiasts.
When purchasing online, always verify the seller’s reputation and review their return policy. Look for models with consistent temperature control and a good capacity for your needs.
Conclusion
Creating your own soy milk yogurt in an electric maker is a simple, healthy, and satisfying endeavor. With just a few basic ingredients and the consistent warmth of your yogurt maker, you can easily produce a creamy, tangy, and probiotic-rich treat free from artificial additives. Embrace the joy of homemade goodness and discover the endless culinary possibilities that homemade soy milk yogurt brings to your kitchen. What delicious toppings or recipes will you explore first with your freshly made soy yogurt?
Frequently Asked Questions
What is the ideal temperature for making soy milk yogurt?
The optimal temperature range for incubating soy milk yogurt is between 110°F and 115°F (43°C-46°C). Maintaining a consistent temperature within this range, typically around 112°F, ensures that the beneficial bacteria in your starter culture can multiply effectively and transform the soy milk into thick, creamy yogurt. Temperatures outside this range can hinder or kill the cultures.
Can I use any type of soy milk to make yogurt?
For the best results, use unsweetened soy milk that contains only two ingredients: soybeans and water. Soy milks with added sugars, oils, gums, or stabilizers can interfere with the fermentation process and may prevent the yogurt from setting properly, resulting in a thin or watery consistency.
How long does homemade soy milk yogurt last?
When stored in an airtight container in the refrigerator, homemade soy milk yogurt typically lasts for up to 7 days. If you plan to use a portion of it as a starter for a new batch, it’s best to do so within the first 7 days to ensure the starter cultures are still potent.
How can I make my soy milk yogurt thicker?
To achieve a thicker consistency, you can incorporate a few strategies. First, ensure you are using a high-quality soy milk made only from soybeans and water. Second, try adding 2-3 tablespoons of cornstarch per 32 ounces of soy milk to the heated milk before adding the starter. Third, for a Greek-style thickness, you can strain the finished yogurt through a cheesecloth-lined colander in the refrigerator overnight to remove excess whey.
What if my yogurt tastes too sour?
If your homemade soy milk yogurt tastes too sour, it generally indicates that it has fermented for too long. Reduce the incubation time in your electric yogurt maker for your next batch. Starting with 12 hours and adjusting from there based on your preferred tanginess is a good approach.