Dreaming of luscious, thick almond milk yogurt but always end up with a runny, disappointing batch? You’re not alone. While dairy yogurt naturally thickens during fermentation, its plant-based counterpart, especially almond milk yogurt, presents a unique challenge to achieve that desired spoonable consistency. But don’t let that deter you from enjoying a delicious, homemade, and gut-friendly treat. This comprehensive guide will equip you with all the knowledge, tips, and tricks to master the art of making perfectly thick and tangy almond milk yogurt right in your own kitchen. Say goodbye to watery results and hello to a satisfyingly creamy alternative!
Understanding Almond Milk Yogurt: Why Thickness Matters
Almond milk yogurt offers a fantastic dairy-free option for those with lactose intolerance, dairy allergies, or who simply prefer a plant-based diet. However, it’s crucial to understand a fundamental difference: almond milk lacks the natural casein proteins found in dairy milk that are responsible for its inherent thickening during fermentation. Without these proteins, almond milk yogurt tends to remain thin unless specific thickening agents and techniques are employed.
Achieving a thick texture is not just about aesthetics; it significantly impacts the mouthfeel and versatility of your yogurt. A thick, creamy yogurt feels more substantial, offers a satisfying spoonful, and can be used in a wider range of applications, from parfaits and dips to savory sauces, much like traditional Greek yogurt.
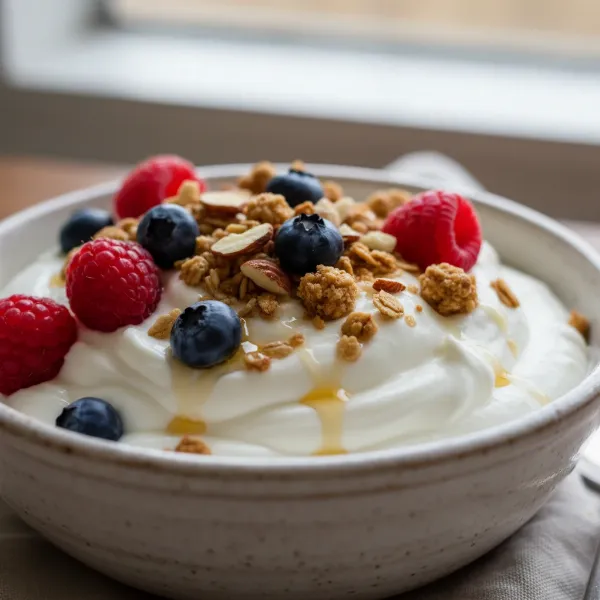 A close-up of a bowl of creamy, thick homemade almond milk yogurt, garnished with berries.
Essential Ingredients for Homemade Almond Milk Yogurt
The quality of your ingredients is paramount to the success of your almond milk yogurt. Here’s what you’ll need:
- Almonds: Opt for raw, unsalted almonds. While whole almonds with skins can be used, blanched almonds often produce a smoother, less earthy-tasting milk. Making your almond milk from scratch is highly recommended, as commercial almond milks often contain additives and preservatives that can interfere with the fermentation process and overall thickness.
- Water: The ratio of almonds to water is critical for thickness. For a richer, thicker almond milk (and consequently, thicker yogurt), use a higher almond-to-water ratio, such as 1 cup of almonds to 2-3 cups of water, rather than the more common 1:4 ratio.
- Sweetener (for culture): Plant-based milks lack the natural sugars (lactose) that dairy starter cultures feed on. A small amount of sugar (like white sugar or pasteurized honey) is essential to “kick-start” the fermentation process. Typically, one teaspoon of sugar per 4 cups of milk is sufficient. Avoid raw honey, as its antibiotic properties can inhibit bacterial growth. Additional sweeteners like maple syrup or vanilla can be added after fermentation for taste.
- Starter Culture: You’ll need a good quality dairy-free yogurt starter culture or the contents of a probiotic capsule (ensure it contains live, active cultures suitable for fermentation, such as Lactobacillus bulgaricus and Streptococcus thermophilus). Look for brands specifically formulated for non-dairy yogurts if possible.
- Thickening Agents: These are the game-changers for achieving that coveted thick texture.
- Agar-Agar: A plant-based gelatin substitute derived from seaweed. It’s flavorless and creates a firm, gel-like consistency.
- Usage: Typically, 1 heaped teaspoon of powdered agar-agar per 4 cups of almond milk. It requires heating to dissolve and activate, usually to about 190°F (87°C) for several minutes.
- Gelatin Powder: A common thickener derived from animal collagen. It provides a smooth, creamy texture.
- Usage: Approximately 1 tablespoon of premium powdered gelatin per 4 cups of almond milk. It needs to be gently warmed to activate (around 95-104°F or 35-40°C) but should not be boiled.
- Arrowroot Powder / Cornstarch: These starches are excellent for thickening and can help prevent separation.
- Usage: About 2 tablespoons per 4 cups of almond milk. Mix with a small amount of cold almond milk to form a slurry before adding to the heated milk to prevent lumps. Cook the milk until it begins to simmer and thicken.
- Xanthan Gum: A powerful thickener and stabilizer. Use very sparingly, as too much can result in a gummy texture.
- Usage: A tiny pinch (1/4 to 1/2 teaspoon) is usually sufficient for a batch of yogurt.
- Agar-Agar: A plant-based gelatin substitute derived from seaweed. It’s flavorless and creates a firm, gel-like consistency.
Equipment You’ll Need
Having the right tools can make the process smoother and more successful:
- High-Speed Blender: Essential for making smooth homemade almond milk.
- Nut Milk Bag or Fine-Mesh Sieve: For straining your almond milk to remove pulp.
- Saucepan: For heating the almond milk and dissolving thickeners.
- Yogurt Maker: Highly recommended for precise temperature control during incubation, which is crucial for consistent results.
- Glass Jars: Clean, sterilized jars for fermenting and storing your yogurt.
- Whisk: For thoroughly combining ingredients.
- Thermometer: An instant-read thermometer is vital to ensure the almond milk is at the correct temperature before adding the starter culture, preventing the beneficial bacteria from being killed by excessive heat.
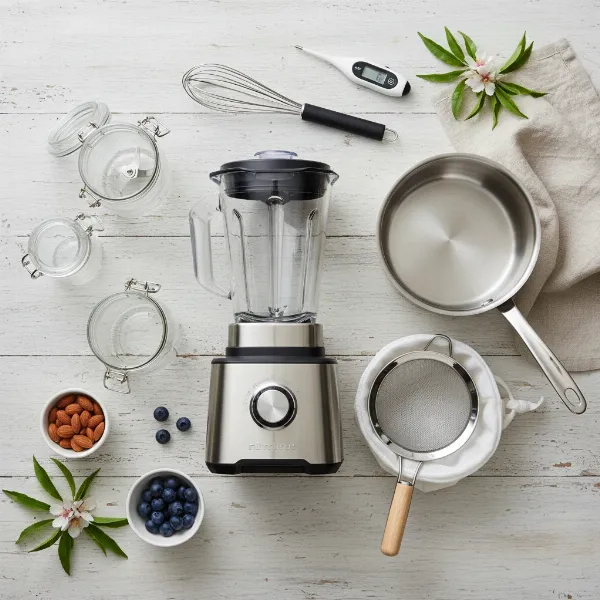 Assortment of kitchen tools like blender, saucepan, yogurt maker, and jars for making yogurt.
Step-by-Step Guide: Making Your Thick Almond Milk Yogurt
This process combines making fresh almond milk with the fermentation steps, focusing on thickening at each stage.
Phase 1: Preparing Your Almond Milk
- Soak Almonds: Start by soaking 1 cup of raw almonds in water overnight, or for at least 6-8 hours. This softens them and aids in digestion. Drain and rinse thoroughly.
- Blend Almond Milk: Combine the soaked almonds with 2-3 cups of fresh water in a high-speed blender. Blend on high until completely smooth and creamy, usually for 1-2 minutes.
- Strain: Pour the almond mixture through a nut milk bag or a fine-mesh sieve lined with cheesecloth into a clean bowl or saucepan. Squeeze or press out all the liquid, discarding the almond pulp (or save it for other recipes). You should have about 3-4 cups of thick almond milk.
- Heat and Thicken: Transfer the homemade almond milk to a saucepan.
- If using Agar-Agar: Add 1 heaped teaspoon of powdered agar-agar to the milk. Whisk to combine. Gently heat the almond milk to 190°F (87°C) and hold this temperature for approximately 5 minutes, stirring occasionally, to fully activate the agar-agar.
- If using Gelatin: Add 1 tablespoon of gelatin powder to the milk. Whisk thoroughly. Gently warm the milk to body temperature, between 95-104°F (35-40°C), stirring to ensure the gelatin dissolves completely. Do not boil.
- If using Arrowroot/Cornstarch: Create a slurry by whisking 2 tablespoons of arrowroot powder or cornstarch with 1/4 cup of cold almond milk. Heat the remaining almond milk in the saucepan until it begins to simmer gently. Slowly whisk in the slurry and continue cooking, stirring constantly, until the milk visibly thickens.
Our Picks for the Best Yogurt maker in 2026As an Amazon Associate I earn from qualifying purchases.Num Product Action 1 Ultimate Probiotic Yogurt Maker with Adjustable Time & Temp Control - Make Trillions of Live Probiotics with Two 1-Quart Containers for Larger Batches - Greek Yogurt Maker - ULTIMATE LIFETIME WARRANTY 
2 Yogurt Maker with Two Containers, Yogurt Maker Machine with Adjustable Temperature & Time Control, Automatic Shut-Off & Constant Temper for Homemade Probiotic Yogurt, Promoting Gut Health
3 Yogurt Maker with Adjustable Temperature & Time Control, Probiotic Yogurt Maker Machine with 8 Glass Jars, Automatic Shut-Off for Homemade Probiotic Yogurt, Promoting Gut Health(48OZ)
4 Yogurt Maker Machine, 8 Glass Jars with Lids Reusable for Yoghurt, Oatmeal, Pudding, or Jello, Food-Grade Martial, One-touch Control, Homemade Yogurt
5 Euro Cuisine Yogurt Maker - YMX650 Automatic Digital Yogurt Maker Machine with Set Temperature - Includes 7-6 oz. Reusable Glass Jars and 7 Rotary Date Setting Lids for Instant Storage
6 GDOR Yogurt Maker with Adjustable Temp & Timer– Probiotic-Rich – Digital Greek Yogurt Machine with 8×6oz BPA-Free Glass Jars, Easy to Use for Home, Stainless Steel
7 Yogurt Maker, Compact Greek Yogurt Maker Machine with Constant Temperature Control, Stainless Steel Container, 1 Quart for Home Organic Yogurt
8 Easy Yogurt Maker for Perfect Homemade Yogurt, 1.7 QT Electric Fermenter for Greek Yogurt, Rice Wine, Natto, with Digital Control & Auto Keep Warm, BPA-Free Container
9 Euro Cuisine YM80 Electric Yogurt Maker Machine- Promote Gut Health with Probiotic Rich Homemade Yogurt -Home Yogurt Incubator with Glass Jars, White
10 Yogurt Dehydrator, Small-Batch Greek Yogurt Maker with Built-In Date Reminder Fresh, Simple & Just the Right Amount — Food-Grade BPA-Free Materials
- Cool: Remove the saucepan from the heat. Allow the thickened almond milk to cool down to below 110°F (43°C). This temperature is crucial; hotter milk will kill the delicate starter cultures. Use your thermometer to verify.
Phase 2: Culturing for Creaminess
- Add Sweetener: Once the milk has cooled to the correct temperature, whisk in 1 teaspoon of white sugar (or 1 tablespoon of pasteurized honey). This provides the necessary food for the bacteria.
- Introduce Starter Culture: Add your chosen dairy-free yogurt starter culture or the contents of 1-2 probiotic capsules. If using a powder, first dissolve it in a small amount of the cooled almond milk to create a slurry, then add it back to the main batch and whisk gently until fully incorporated.
- Incubate: Pour the cultured almond milk into your sterilized glass jar(s). Place the jar(s) into your yogurt maker. If using a yogurt maker, set the temperature to 100-108°F (38-42°C) and the time to 12-24 hours. A longer fermentation time (up to 24 hours) generally results in a tangier and sometimes thicker yogurt. If you don’t have a yogurt maker, you can use an oven with a pilot light, an insulated cooler with warm water bottles, or even a warm spot in your kitchen (though temperature consistency may vary).
Phase 3: Setting and Perfecting Texture
- Refrigerate: After the incubation period, your almond milk yogurt may still appear somewhat thin, curdled, or separated while warm. Do not worry. Carefully remove the jar(s) from the yogurt maker. Place them directly into the refrigerator for at least 6 hours, or preferably overnight. Chilling is essential for the yogurt to fully set and thicken further.
- Whisk for Smoothness: Once thoroughly chilled and set, remove the yogurt from the fridge. Give it a good whisk by hand to achieve a smooth, creamy, and uniform consistency. If adding flavorings like vanilla bean paste or additional sweeteners (maple syrup, agave, stevia), do so now and whisk them in.
Expert Thickening Tips & Troubleshooting
Achieving the perfect consistency might take a couple of tries, but these tips will help you fine-tune your process:
- Adjust Almond-to-Water Ratio: This is your first line of defense against thin yogurt. Starting with a more concentrated almond milk will give you a significant advantage.
- Experiment with Thickeners: Different thickeners yield slightly different textures. Agar-agar creates a firmer, jelly-like set, while gelatin tends to be smoother and more custardy. Arrowroot or cornstarch provides a more traditional creamy texture and helps prevent separation. Don’t be afraid to try different options or even a combination (e.g., a small amount of agar-agar with arrowroot).
- Drain Excess Liquid (Whey): For an extra-thick, Greek-style almond milk yogurt, you can gently drain off any separated liquid (which is usually just water, not true whey) after refrigeration. Line a colander with a nut milk bag or several layers of cheesecloth, pour in the yogurt, and let it sit in the fridge for a few hours.
- Batch Consistency: Some find that subsequent batches made with a portion of the previous homemade yogurt as a starter can gradually become thicker over time.
- Addressing Separation: If your yogurt separates into a watery layer and a thicker layer, incorporating arrowroot or cornstarch during the heating phase can help create a more stable emulsion and prevent this.
- Common Issues:
- Too Thin: Increase almond-to-water ratio, use more or a different thickening agent, ensure proper incubation temperature and duration, and allow ample refrigeration time.
- Not Tangy Enough: Extend the incubation time. Longer fermentation produces more lactic acid, leading to a tangier flavor.
- Curdled/Grainy Texture: Ensure your almond milk is very smooth before fermentation. Overheating the milk or adding the starter when it’s too hot can also cause issues. Whisking well after refrigeration can often smooth out minor graininess.
“Making plant-based yogurt is a beautiful blend of science and patience. Don’t rush the cooling or chilling phases, and remember that experimentation with thickeners is key to finding your perfect texture.” – Chef Anya Sharma, Vegan Culinary Expert
Flavoring and Serving Suggestions
Once your almond milk yogurt is perfectly thick and tangy, the possibilities are endless!
- Add Flavorings: Stir in vanilla bean paste, cinnamon, or a touch of almond extract after fermentation and chilling.
- Sweeten to Taste: Incorporate maple syrup, agave nectar, date syrup, or your preferred sweetener to achieve your desired level of sweetness.
- Serving Ideas: Enjoy with fresh berries, chopped nuts, granola, or a drizzle of honey. Use it as a base for smoothies, a healthy dollop on oatmeal, or a creamy component in savory dishes like dips, dressings, or even marinades for plant-based proteins.
Storage and Shelf Life
Homemade almond milk yogurt generally keeps well in an airtight container in the refrigerator for 4-5 days, and sometimes up to a week. Always check for any off-smells or discoloration before consuming.
Conclusion
Making thick and creamy almond milk yogurt at home is a rewarding culinary adventure that allows you to control ingredients and customize flavors. By understanding the unique properties of almond milk, selecting the right thickening agents, and meticulously following the fermentation process, you can consistently achieve a satisfyingly rich and spoonable yogurt. Embrace the journey of experimentation, and soon you’ll be enjoying delicious, homemade plant-based yogurt that rivals any store-bought alternative. What delicious creations will you make with your perfectly thick almond milk yogurt?
Frequently Asked Questions
Can I use store-bought almond milk to make yogurt?
While technically possible, it’s generally not recommended. Store-bought almond milks often contain stabilizers, gums, and other additives that can interfere with the fermentation process and lead to a thinner, less consistent yogurt. For best results, use fresh, homemade almond milk with minimal ingredients.
How long does homemade almond milk yogurt last?
Homemade almond milk yogurt, stored in an airtight container in the refrigerator, typically lasts for 4 to 7 days. Always trust your senses; if it smells off, or shows any signs of mold, it’s best to discard it.
What if my almond milk yogurt is still thin after following the steps?
If your yogurt remains thin, consider increasing the almond-to-water ratio when making your almond milk or increasing the amount of your chosen thickening agent. Ensure your incubation temperature was consistent and that the yogurt had ample time to chill and set in the refrigerator. Draining excess liquid can also help achieve a thicker consistency.
What is the best starter culture for almond milk yogurt?
Look for a dairy-free yogurt starter culture or a high-quality probiotic capsule containing live active cultures like Lactobacillus bulgaricus and Streptococcus thermophilus. These strains are effective at fermenting plant-based milks. Ensure the product explicitly states it’s suitable for vegan yogurt.
Can I make almond milk yogurt without a yogurt maker?
Yes, you can make almond milk yogurt without a dedicated yogurt maker. Alternatives include using an oven with only the pilot light on, an insulated cooler with jars nestled among warm water bottles, or even wrapping your jar in a towel and placing it in a warm spot in your kitchen. However, a yogurt maker offers the most consistent temperature control, leading to more reliable results.