Crafting creamy, delicious homemade yogurt is a rewarding experience, but achieving that perfect batch relies heavily on one often-overlooked step: proper jar sanitization. Without it, you risk not just an unpleasant flavor or texture, but potentially harmful bacterial growth that can turn your wholesome efforts sour. This guide will walk you through the essential techniques to effectively sanitize your yogurt jars, ensuring every batch of homemade yogurt is safe, consistent, and utterly delightful.
The Non-Negotiable Step: Why Sanitize Your Yogurt Jars?
Imagine providing a perfectly warm, nutrient-rich environment for beneficial bacteria to thrive. That’s exactly what you do when you make yogurt. However, this ideal environment is equally inviting to undesirable microorganisms – wild bacteria, yeasts, and fungi – that can compromise your yogurt. These unwelcome guests can lead to a host of problems, from an off-putting taste and strange texture to outright spoilage.
When you introduce your starter culture to milk in an inadequately prepared jar, you’re giving harmful microbes a head start. They can outcompete the good bacteria, preventing your yogurt from setting properly or leading to an unpalatable, sometimes even unsafe, product. Proper sanitization significantly reduces this microbial competition, creating a clean slate where your chosen starter cultures can flourish, ensuring a delicious and healthy outcome every time.
Understanding the Essentials: Clean, Sanitize, Sterilize
Before diving into methods, it’s crucial to understand the distinct differences between cleaning, sanitizing, and sterilizing, particularly in the context of food preparation.
- Cleaning: This is the foundational step. Cleaning involves physically removing visible dirt, food residues, and other impurities from surfaces using soap or detergent and water. While essential, cleaning alone does not eliminate all microorganisms. Think of it as preparing the surface for the next, more intensive step.
- Sanitizing: Sanitizing reduces the number of microorganisms on a surface to a level considered safe by public health standards. It doesn’t necessarily kill all germs, but it significantly lowers their count, making the environment inhospitable for those that could cause spoilage or illness. For homemade yogurt, sanitizing is generally the target, creating a sufficiently clean environment for your cultures.
- Sterilizing: Sterilizing takes it a step further, destroying or eliminating all forms of microbial life, including bacteria, viruses, and spores. This level of microbial reduction is typically required in medical settings. While true sterilization might be overkill for home yogurt making, many of the methods we employ for jars achieve a very high level of sanitization, often referred to as “sterilization” in home canning and cooking circles due to their effectiveness in preventing spoilage. The goal is to create an environment where the beneficial yogurt cultures can dominate without competition.
For homemade yogurt, the primary aim is robust sanitization. This critical step ensures that the only bacteria multiplying in your warm milk are the beneficial ones from your starter culture, leading to thick, tangy, and safe yogurt.
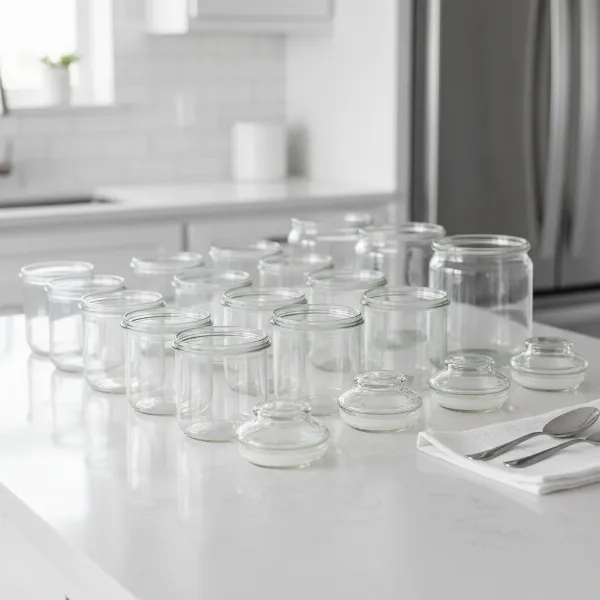 Sparkling clean glass jars lined up, ready for yogurt making, symbolizing proper food sanitization.
Proven Methods for Effective Yogurt Jar Sanitization
Achieving a clean, microbe-free environment for your homemade yogurt doesn’t have to be complicated. Here are several effective methods to sanitize your glass jars and ensure your fermentation process gets the best start.
Method 1: Boiling Water (The Classic & Reliable Choice)
|
Our Picks for the Best Yogurt maker in 2026
As an Amazon Associate I earn from qualifying purchases.
|
||
| Num | Product | Action |
|---|---|---|
| 1 | Yogurt Maker, Compact Greek Yogurt Maker Machine with Constant Temperature Control, Stainless Steel Container, 1 Quart for Home Organic Yogurt |

|
| 2 | Easy Yogurt Maker for Perfect Homemade Yogurt, 1.7 QT Electric Fermenter for Greek Yogurt, Rice Wine, Natto, with Digital Control & Auto Keep Warm, BPA-Free Container |
|
| 3 | Ultimate Probiotic Yogurt Maker with Adjustable Time & Temp Control - Make Trillions of Live Probiotics with Two 1-Quart Containers for Larger Batches - Greek Yogurt Maker - ULTIMATE LIFETIME WARRANTY |
|
| 4 | Yogurt Maker Machine, 8 Glass Jars with Lids Reusable for Yoghurt, Oatmeal, Pudding, or Jello, Food-Grade Martial, One-touch Control, Homemade Yogurt |
|
| 5 | Yogurt Maker with Adjustable Temperature & Time Control, Probiotic Yogurt Maker Machine with 8 Glass Jars, Automatic Shut-Off for Homemade Probiotic Yogurt, Promoting Gut Health(48OZ) |
|
| 6 | Yogurt Maker with Two Containers, Yogurt Maker Machine with Adjustable Temperature & Time Control, Automatic Shut-Off & Constant Temper for Homemade Probiotic Yogurt, Promoting Gut Health |
|
| 7 | Yogurt Dehydrator, Small-Batch Greek Yogurt Maker with Built-In Date Reminder Fresh, Simple & Just the Right Amount — Food-Grade BPA-Free Materials |
|
| 8 | Euro Cuisine YM80 Electric Yogurt Maker Machine- Promote Gut Health with Probiotic Rich Homemade Yogurt -Home Yogurt Incubator with Glass Jars, White |
|
| 9 | GDOR Yogurt Maker with Adjustable Temp & Timer– Probiotic-Rich – Digital Greek Yogurt Machine with 8×6oz BPA-Free Glass Jars, Easy to Use for Home, Stainless Steel |
|
| 10 | Euro Cuisine Yogurt Maker - YMX650 Automatic Digital Yogurt Maker Machine with Set Temperature - Includes 7-6 oz. Reusable Glass Jars and 7 Rotary Date Setting Lids for Instant Storage |
|
The boiling water method is widely regarded as one of the most effective and accessible ways to sanitize glass jars for food preservation. It uses sustained high heat to kill unwanted microorganisms.
Step-by-Step Instructions:
- Clean Thoroughly: First, wash your glass jars, lids, and any other equipment (like whisks or spoons that will touch the milk) with hot, soapy water. Use a bottle brush to reach all corners and ensure no food residues remain. Rinse everything completely to remove all soap.
- Prepare a Large Pot: Place a rack at the bottom of a large stockpot or canning kettle. This prevents the jars from touching the bottom directly, which could cause cracking.
- Arrange Jars: Carefully place your clean jars right side up on the rack. If using, include heat-safe lids (like metal canning lids or glass lids without rubber seals) in the pot.
- Cover with Water: Fill the pot and the jars with hot (but not yet boiling) water, ensuring the water level covers the tops of the jars by at least one inch.
- Boil: Bring the water to a rolling boil over high heat.
- Sanitize: Once boiling, continue to boil the jars for a minimum of 10 minutes. For elevations above 1,000 feet, add one additional minute of boiling time for each extra 1,000 feet of elevation.
- Remove Safely: Carefully remove the hot, sanitized jars one at a time using canning tongs or a jar lifter. Invert them onto a clean, dry, heat-resistant surface (like a baking rack lined with a clean towel) to drain and air dry completely. Avoid wiping the insides, as this can reintroduce contaminants.
- Keep Warm (Optional): If you are filling the jars immediately with hot yogurt, keeping them warm can prevent thermal shock. Otherwise, ensure they are thoroughly dry before use.
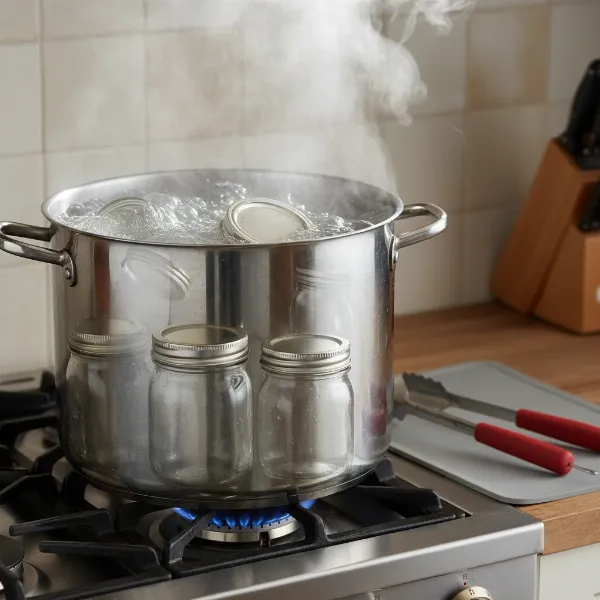 Glass jars being sanitized in a large pot of boiling water, preparing for homemade yogurt.
Method 2: Oven Sanitization (For Batch Processing)
The oven method is excellent for sanitizing multiple jars simultaneously and keeping them warm until ready for filling.
Step-by-Step Instructions:
- Clean Jars: Begin by washing your glass jars thoroughly with hot, soapy water, ensuring all residues are gone. Rinse them well and leave them slightly wet.
- Preheat Oven: Preheat your oven to 275°F (130°C). Do not set the temperature higher, as this increases the risk of jars cracking or shattering.
- Arrange on Tray: Place a clean baking sheet or oven rack in the oven. Arrange the wet, clean jars upright on the baking sheet, making sure they do not touch each other. You can place a double layer of newspaper on the oven shelf if desired, but keep it away from any flames in gas ovens.
- Sanitize: Close the oven door and “sterilize” the jars for a minimum of 20 minutes.
- Keep Hot: Turn off the oven but keep the jars inside with the door closed until you are ready to fill them. This keeps them hot, which is crucial for preventing thermal shock when adding warm yogurt.
- Handle with Care: Use thick oven mitts or tongs to remove jars one by one as needed, placing them on a heatproof mat. This method is suitable for glass jars and metal lids without rubber seals.
Method 3: Dishwasher with Sanitize Cycle (Convenient Option)
For those with a dishwasher equipped with a “sanitize” or “high-temperature wash” cycle, this can be a convenient method.
How to Ensure Effectiveness:
- Pre-Clean Jars: Load only clean, empty glass jars into your dishwasher. Ensure no food particles or debris are clinging to them.
- Use Sanitize Cycle: Run the dishwasher on its hottest and longest cycle, specifically selecting the “sanitize” option if available. This cycle uses very high water temperatures during the wash and rinse phases to reduce bacteria to safe levels.
- Dry Completely: Allow the jars to complete the full cycle, including the heated drying phase. Remove them only when you are ready to fill them, handling them with clean hands.
Method 4: Microwave Sanitization (Quick for Smaller Jars)
The microwave can offer a quick sanitization solution for smaller glass jars, but it requires careful attention.
Procedure and Caveats:
- Clean & Wet: Wash jars thoroughly with hot, soapy water and rinse completely. Leave a small amount of water (about an inch) in the bottom of each jar. This water will turn to steam and sanitize the jar.
- Microwave: Place the wet jars in the microwave (ensure no metal parts are present, as this is critical). Microwave on high for 30 to 60 seconds, or until the water boils and the jar is steaming.
- Handle Carefully: The jars will be extremely hot. Use oven mitts to carefully remove them. Pour out any remaining water and let them air dry on a clean rack. This method is not suitable for jars with metal lids or those with rubber seals.
Beyond Sanitization: Best Practices for Impeccable Yogurt Hygiene
Sanitizing your jars is a major step, but it’s part of a larger picture of good hygiene that ensures your homemade yogurt is perfect every time.
- Handle with Care: Once jars are sanitized and dry, handle them only with clean hands or sterile tongs. Avoid touching the insides of the jars or lids to prevent reintroducing bacteria.
- Sanitize Lids and Equipment: Don’t forget the lids and any other utensils that will come into contact with your milk and yogurt. Metal lids can often be boiled with the jars, or quickly dipped in boiling water. Silicone seals and plastic lids might require gentler hot water sanitization or a thorough wash with soap and hot water.
- Maintain a Clean Workspace: Prepare your yogurt in a clean kitchen environment. Wipe down countertops and ensure your hands are washed thoroughly before you begin. A clean workspace minimizes airborne contaminants that could find their way into your yogurt.
- Quality Ingredients: Start with high-quality, pasteurized milk and a fresh, active yogurt starter. These ingredients are the foundation of good yogurt. Even with perfectly sanitized jars, poor quality milk or inactive starter can lead to subpar results.
“A clean, sterilized jar is essential for ensuring the success and longevity of your jams and preserves. Sterilizing removes any bacteria, yeasts, or fungi, safeguarding the food inside. Dirty jars that aren’t properly cleaned can contaminate the food and lead to it spoiling quickly.” – The Spruce Eats. This principle applies equally to yogurt, emphasizing the protective role of thorough sanitization.
Troubleshooting Common Sanitization Questions
Homemade Yogurt Makers often have questions about the nuances of jar hygiene. Here are answers to some common concerns:
Is cleaning with just soap and water enough for yogurt jars?
No, simply washing jars with soap and water is typically not enough to thoroughly sanitize them for yogurt making. While cleaning removes visible dirt and some germs, it doesn’t reduce the microbial count to a safe level to prevent unwanted bacterial growth during the lengthy yogurt incubation period. Following up with a heat-based sanitization method is highly recommended.
How hot should water be to sanitize jars?
For effective heat-based sanitization, water needs to reach a rolling boil (212°F or 100°C at sea level) and maintain that temperature for a specified duration, typically 10 minutes for jars immersed in a boiling water bath. For methods like pouring boiling water, the extreme heat itself is sufficient upon contact.
Can I put hot yogurt in cold jars?
It is strongly advised not to put hot yogurt into cold jars, or vice versa, due to the risk of thermal shock. This sudden temperature difference can cause glass jars to crack or even shatter, creating a safety hazard. Always ensure your jars are at a similar temperature to the food you are putting into them.
What happens if I don’t sanitize my yogurt jars?
If you skip sanitizing your yogurt jars, you risk contamination from wild bacteria, yeasts, and molds. These undesirable microorganisms can outcompete your starter culture, leading to yogurt that doesn’t set properly, has an unusual texture (like sliminess), develops off-flavors (sour, bitter, or yeasty), or spoils quickly. In some cases, it could potentially lead to foodborne illness.
Is vinegar effective for sanitizing yogurt jars?
While vinegar is an excellent natural cleaner and can inhibit some bacterial growth, it is generally considered an acidifier and cleaner, not a powerful sanitizer or sterilizer on its own. It’s great for removing mineral deposits or odors, but for truly reducing microbial load to safe levels for yogurt, heat-based methods are more reliable.
Conclusion
The journey to making perfect homemade yogurt begins long before the milk meets the starter. It starts with a commitment to hygiene, particularly through proper jar sanitization. By understanding the critical distinction between cleaning and sanitizing, and by consistently applying effective methods like boiling, oven heat, or a dishwasher’s sanitize cycle, you create the ideal conditions for your beneficial cultures to flourish. This small but vital effort not only safeguards the freshness and longevity of your yogurt but also elevates its taste and texture to professional standards. So, the next time you prepare to make a batch, remember: a clean jar is the first secret to a truly outstanding homemade yogurt. What new flavors will you create with your perfectly prepared jars?