So, you’re thinking about diving into the wonderful world of homemade yogurt. Welcome to the club! I still remember the first time I traded a store-bought tub for a creamy, tangy batch made right in my own kitchen. The difference was night and day. If you’re looking for consistency, flavor, and that “I made this!” satisfaction, a yogurt maker is your new best friend. But figuring out how to use a yogurt maker can feel a little daunting at first. Don’t worry, I’ve been there. This guide is here to walk you through everything, from unboxing to your first perfect spoonful, and even answer questions like What Is The Best Way To Store The Jars afterward.
What’s a Yogurt Maker and Why You Genuinely Need One
Let’s get straight to it. A yogurt maker isn’t some overly complicated kitchen gadget destined to collect dust. Think of it as a tiny, perfect incubator designed for one job: keeping your yogurt culture cozy. At its core, it’s a simple appliance that maintains a consistent, low temperature for several hours.
Why is that so important? Because making yogurt is all about fermentation. You introduce live bacterial cultures (the good guys!) into milk, and they need a stable, warm environment to multiply and work their magic. They eat the lactose (milk sugar) and produce lactic acid, which in turn thickens the milk and gives yogurt its signature tangy flavor. Too cold, and the bacteria fall asleep on the job. Too hot, and you’ll unfortunately cook them. A yogurt maker takes out all the guesswork, giving you a foolproof way to get creamy, delicious results every single time. It’s the difference between hoping for the best and knowing it will be great.
How Does a Yogurt Maker Actually Work?
A yogurt maker works by creating a controlled environment with a gentle, consistent heat source, typically around 110-115°F (43-46°C). This is the ideal temperature for the active bacteria in your starter culture to thrive and ferment milk into yogurt over a period of several hours.
It’s really that simple. You mix your milk and starter, pour it into the jars, place them inside the machine, pop the lid on, and set the timer. The machine then maintains that perfect “yogurt spa” temperature, ensuring the fermentation process happens correctly and evenly. No more trying to use your oven with the light on or wrapping a pot in towels—the yogurt maker handles it all with precision.
Bảng trống.Key Features to Look for Before You Buy
Walking down the appliance aisle (or scrolling online) can be overwhelming. Not all yogurt makers are created equal. Here are a few key features I always tell people to look for:
- Capacity and Jar Type: Are you making yogurt for one or for a whole family? Makers come with a single large tub or, more commonly, a set of individual glass or plastic jars. I’m a huge fan of glass jars—they’re non-reactive, easy to clean, and perfect for portion control.
- Automatic Timer and Shut-off: This is a game-changer. A model with an automatic timer lets you “set it and forget it.” It will turn off the heating element when the time is up, preventing your yogurt from over-culturing and becoming too sour.
- Temperature Control: While most basic models have a preset temperature, some more advanced ones allow you to adjust it. This is great if you want to experiment with different types of cultures (like Greek or non-dairy) that might thrive at slightly different temperatures.
- Ease of Cleaning: Look for models with dishwasher-safe jars and lids. Trust me, easy cleanup makes you much more likely to use it regularly.
Your Step-by-Step Guide to Using a Yogurt Maker
Alright, ready to make your first batch? It’s easier than you think. Let’s walk through it together.
- Heat Your Milk: Pour your desired amount of milk (whole milk makes the creamiest yogurt!) into a saucepan. Gently heat it on the stove to about 180°F (82°C). This step is crucial because it denatures the milk proteins, which results in a thicker, more stable yogurt. Don’t boil it!
- Cool It Down: Once it hits 180°F, take the milk off the heat and let it cool down to about 110-115°F (43-46°C). This is very important. If the milk is too hot when you add your starter, you’ll kill the beneficial bacteria. A digital thermometer is your best friend here.
- Introduce Your Starter: Take a small amount of your cooled milk (about a cup) and whisk it in a separate bowl with your starter culture. Your starter can be a few tablespoons of a previous batch of homemade yogurt or a store-bought plain yogurt with “live active cultures,” or a freeze-dried starter packet. Mix until it’s smooth to avoid lumps.
- Combine and Fill: Pour the starter-milk mixture back into the main pot of cooled milk and stir gently until it’s fully incorporated. Now, carefully pour the mixture into your yogurt maker’s jars.
- Incubate: Place the jars (usually without their individual lids on) into the yogurt maker, put the main lid on the machine, and set the timer. A good starting point is 8 hours. The longer it incubates, the tangier your yogurt will be.
- Chill Out: Once the timer goes off, the hard part is over! Carefully remove the jars, put their lids on, and place them in the refrigerator for at least 6 hours, but preferably overnight. This chilling process is essential—it stops the fermentation and allows the yogurt to set and thicken up properly.
A Quick Tip: The thin, watery layer you might see on top of your finished yogurt is just whey. You can either stir it back in for a thinner consistency or pour it off for a thicker, Greek-style yogurt.
Pro Tips for Perfectly Creamy Homemade Yogurt
After dozens (maybe hundreds!) of batches, I’ve picked up a few tricks that make a world of difference.
Choosing Your Starter Culture
The starter you use directly impacts the flavor and texture of your yogurt. Using a few spoonfuls of your favorite plain, store-bought yogurt is the easiest way to begin. Just make sure the label says “contains live and active cultures.” For more consistent results, you can buy powdered starter cultures online or at health food stores. They come in different strains that produce different flavors, from mild to super tangy. Feel free to experiment with [our guide to the best starter cultures] to find your favorite.
The Great Milk Debate: Which One is Best?
For the richest, creamiest yogurt, nothing beats whole dairy milk. The fat content contributes directly to that luxurious texture. Low-fat or skim milk will work, but the result will be thinner. If you’re using non-dairy milk like soy or almond, be aware that they lack lactose, so they won’t thicken the same way. You’ll often need to add a thickener like agar-agar or pectin to get a good set.
Incubation Time: The Secret to Tanginess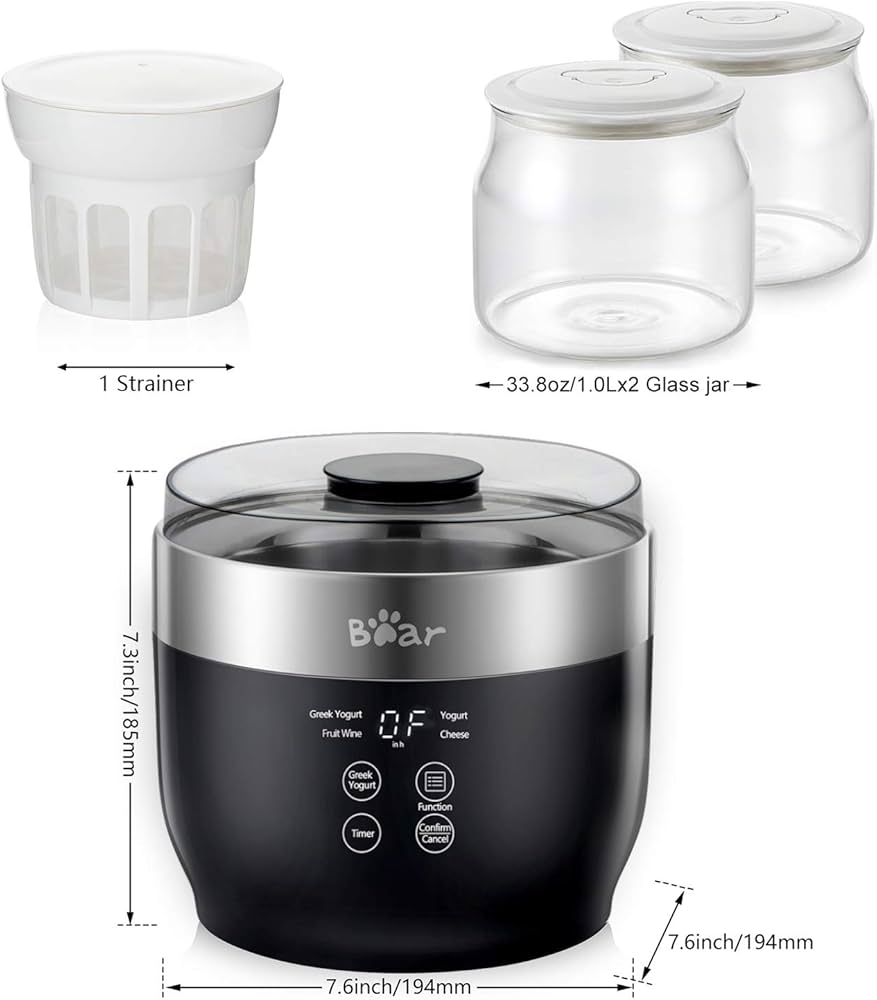
The length of incubation is your primary tool for controlling flavor.
- 6-8 hours: A mild, less tangy yogurt. Great for beginners.
- 9-12 hours: A classic, moderately tangy yogurt. This is my personal sweet spot.
- 12+ hours: A very tangy, tart yogurt, similar to traditional Greek or Bulgarian styles.
The Real Perks of Making Your Own Yogurt
Beyond just tasting amazing, making yogurt at home has some serious benefits.
- Healthier: You are in complete control. No added sugars, preservatives, or artificial thickeners. It’s also packed with more beneficial probiotics than many commercial brands.
- Cheaper: A gallon of milk and a few tablespoons of starter can produce a huge amount of yogurt for a fraction of the cost of buying individual cups at the grocery store.
- Tastier: The freshness is unbeatable. You can also customize it exactly to your liking—make it as tangy or as mild as you want, and [check out our favorite Greek yogurt recipe] once you’ve mastered the basics.
- Eco-Friendly: Reusing glass jars means significantly less plastic waste. It’s a small change that feels really good.
How to Clean and Maintain Your Yogurt Maker
Keeping your yogurt maker in top shape is simple. The main unit itself usually just needs a quick wipe-down with a damp cloth if there are any spills. Never submerge the base in water. The real question most people have is about the jars.
What is the best way to store the jars?
The best way to store the jars for your yogurt maker is to ensure they are completely clean and dry before putting them away. Wash the jars and lids thoroughly with hot, soapy water or run them through the dishwasher. Once dry, store them with the lids off or placed loosely on top to allow for air circulation and prevent any musty odors from developing.
I like to store my jars right back inside the yogurt maker base. It keeps everything together in one neat package, so I’m not hunting for a missing jar or lid when I’m ready to make my next batch. This protects them from dust and keeps your cupboard organized.
As registered dietitian and fermentation specialist Dr. Elena Vance notes, “The beauty of homemade yogurt lies in its living probiotic profile. Proper cleaning and storage of your equipment, especially the jars, is essential to ensure that you are cultivating beneficial bacteria, not unwanted ones.”
Frequently Asked Questions
Why is my homemade yogurt runny?
This is the most common issue! It’s usually due to one of three things: the milk wasn’t heated and cooled properly, the starter culture was old or inactive, or the incubation time was too short. Try heating your milk to 180°F next time and make sure your starter is fresh.
Can I use non-dairy milk in my yogurt maker?
Yes, but with some adjustments. Almond, soy, and coconut milk can all be used, but they often require a thickener and may need a specific non-dairy starter culture. The results will vary, so be prepared for a little experimentation.
How long does homemade yogurt last in the fridge?
When stored in airtight containers, your fresh homemade yogurt should last for about 1 to 2 weeks in the refrigerator. It will get tangier over time as a very slow fermentation continues.
Can I make Greek yogurt in a regular yogurt maker?
Absolutely! You make a regular batch of yogurt following the steps above. Then, to turn it into Greek yogurt, you just need to strain it. Line a colander with a few layers of cheesecloth or a clean tea towel, set it over a bowl, pour your finished yogurt in, and let it strain in the fridge for a few hours. The longer you strain, the thicker it gets.
Do I need to sterilize my jars every time?
While a full sterilization isn’t always necessary, making sure your jars are scrupulously clean is a must. Running them through a hot cycle in the dishwasher is usually sufficient to get them ready for a new batch.
Ready to Start Your Yogurt Journey?
Learning how to use a yogurt maker is one of the most rewarding kitchen skills you can pick up. It’s a simple process that opens up a world of healthy, delicious, and creative possibilities. You’ll save money, reduce waste, and enjoy yogurt that tastes better than anything you can buy. From getting the incubation just right to figuring out what is the best way to store the jars, you now have all the knowledge you need. So go ahead, grab some milk and a good starter, and get ready to be amazed at what you can create.