There’s something deeply satisfying about cracking open a jar of thick, creamy, homemade yogurt. It’s a world away from the often overly sweet, store-bought varieties. But if you’ve ever tried making it on the stovetop or in the oven, you know the struggle is real. One minute it’s warm milk, the next it’s… well, still warm milk. Getting that “just right” temperature for fermentation can feel like a work of art. This is where a yogurt maker comes in, and today we’re demystifying a wonderfully simple tool for the job. So, What Is A Manual Yogurt Maker and could it be your ticket to yogurt perfection?
Let’s dive in. A manual yogurt maker, at its core, is a non-electric, insulated container designed to maintain a consistent, warm temperature for several hours. This stable environment is the secret sauce for allowing the good bacteria—your starter culture—to work its magic, transforming milk into delicious, tangy yogurt. Think of it less as a complex “machine” and more as a cozy, purpose-built cocoon for your future yogurt.
How Does a Manual Yogurt Maker Actually Work?:strip_icc()/bhg-ice-cream-makers-test-donvier-manual-1-quart-rkilgore-877-11319ab649f046b0b3951351d583c596.jpeg)
How can a device with no plugs or batteries create the perfect environment for yogurt? The answer is simple and brilliant: insulation. A manual yogurt maker works just like a high-quality thermos or cooler, trapping heat inside to keep the contents at a stable temperature for the entire fermentation period.
You start by heating your milk on the stove and then cooling it to the ideal inoculation temperature (usually around 110-115°F or 43-46°C). After mixing in your starter culture, you pour the mixture into the inner container of the manual yogurt maker, seal it up, and place it inside the insulated outer shell. The pre-heated milk provides all the warmth needed. The insulator’s job is simply to prevent that heat from escaping, creating a perfect, passive incubator for the bacteria to thrive and thicken your milk into yogurt over the next 8 to 12 hours.
|
Our Picks for the Best Yogurt Maker in 2025
As an Amazon Associate, we earn from qualifying purchases.
|
||
| Num | Product | Action |
|---|---|---|
| 1 | Suteck Yogurt Maker - Stainless Steel Yogurt Makers with Adjustable Time & Temp Control,Automatic Shut-Off & Constant Temper for Homemade Greek, Probiotic Yogurt, BPA-Free 8 Glass Jars (48 oz) |

|
| 2 | Ultimate Probiotic Yogurt Maker with Adjustable Temperature & Time Control - Make Trillions of Live Probiotics & Get Better Gut Health - ULTIMATE LIFETIME WARRANTY - Wellness Gifts for Men & Women |
|
| 3 | Yogurt Maker, Automatic Digital Yoghurt Maker Machine with 5 Glass Jars 42 Ozs, with Constant Temperature Control for Home Organic Yogurt, Cheese, Fruit Wine (No Cups) |
|
| 4 | Yogurt Maker, Automatic Digital Yoghurt Maker Machine with 5 Glass Jars 42 Ozs, with Constant Temperature Control for Home Organic Yogurt, Cheese, Fruit Wine (with 5 Cups) |
|
| 5 | Euro Cuisine YM360 Yogurt Maker with Adjustable Time & Temperature Control - 2-Quart Glass Jar, FREE Thermometer & Cotton Strainer Bag, 2025 Edition, Black, Make Yummy Organic Probiotic Yogurt at Home |
|
| 6 | Ultimate Yogurt Jars - Make More Delicious Yogurt! 8 Count Small Glass Yogurt Cups With Lids - 100% BPA Free, Airtight & Dishwasher Safe! Perfect Containers for Yoghurt, Oatmeal, Pudding, or Jello |
|
| 7 | Suteck Yogurt Maker with 8 Glass Jars, Time & Temp Adjustable Control Yogurt Machine, Homemade Greek & Probiotic Yogurt, Automatic Shut-Off, BPA-Free, 48 oz Total, |
|
| 8 | DASH My Mug Ice Cream Maker Machine (Aqua): Multi-Purpose Soft Serve Ice Cream Machine with (2) Bowls for Homemade Gelato, Sorbet, Frozen Yogurt, Built-In Ingredient Chute, Easy to Clean and Store |
|
| 9 | Bear Yogurt Maker, Greek Yogurt Maker Machine with Strainer and Timer Control, Stainless Steel Inner Pot, Automatic Digital with 2 Glass Jars 1 Quart for Home Organic Yogurt, Cheese, Fruit Wine |
|
| 10 | Ultimate Probiotic Yogurt Maker with Adjustable Temperature & Time Control - Make Trillions of Live Probiotics & Get Better Gut Health - ULTIMATE LIFETIME WARRANTY - Wellness Gifts for Men & Women |
|
Manual vs. Electric: What’s the Difference?
When you start shopping, you’ll see two main types: manual and electric. It’s a bit like choosing between a French press and a drip coffee machine—both get the job done, but the process and philosophy are a little different.
A manual yogurt maker is the epitome of simplicity. No cords, no settings, no electricity required. It’s portable, foolproof, and great for off-grid living or just a minimalist kitchen. An electric yogurt maker, on the other hand, uses a low-wattage heating element to actively maintain the temperature. They often come with timers, automatic shut-off features, and sometimes even different temperature settings for various types of ferments.
Here’s a quick breakdown to help you compare:
| Feature | Manual Yogurt Maker | Electric Yogurt Maker |
|---|---|---|
| Power Source | None (uses residual heat from milk) | Electricity (plugs into an outlet) |
| Temperature Control | Passive (relies on insulation) | Active (uses a heating element) |
| Consistency | Very consistent if started at the right temp | Highly consistent, less user error |
| Portability | Excellent, can be used anywhere | Limited to proximity to an outlet |
| Ease of Use | Extremely simple, no buttons or settings | Simple, but requires setting a timer |
| Cost | Generally more affordable | Wider price range, often more expensive |
| Best For | Minimalists, off-grid use, simple batches | Precision, set-and-forget convenience |
Key Features to Look For in a Manual Yogurt Maker
Even for a simple device, a few key features can make a big difference in your yogurt-making experience. If you’re considering buying one, keep an eye out for these things:
- Insulation Quality: This is the most critical feature. Look for models with double-walled construction, preferably with a vacuum seal or thick foam insulation. Better insulation means a more stable temperature and more reliable results.
- Inner Container Material: The pot that holds your yogurt matters.
- Glass: Non-reactive, easy to clean, and allows you to see the yogurt without opening the lid. It’s a fantastic, pure choice.
- Stainless Steel: Durable, lightweight, and won’t break if dropped. It’s also excellent at retaining heat.
- BPA-Free Plastic: The most affordable and lightweight option, but make sure it’s high-quality and certified BPA-free.
- Capacity: How much yogurt do you and your family eat? Manual models typically come in sizes ranging from 1 to 2 quarts (or liters). A 1-quart model is perfect for individuals or couples, while a 2-quart version is better for families.
- Airtight Lid: A good seal on both the inner container and the outer insulator is important to keep the heat in and contaminants out.
Your First Batch: A Step-by-Step Guide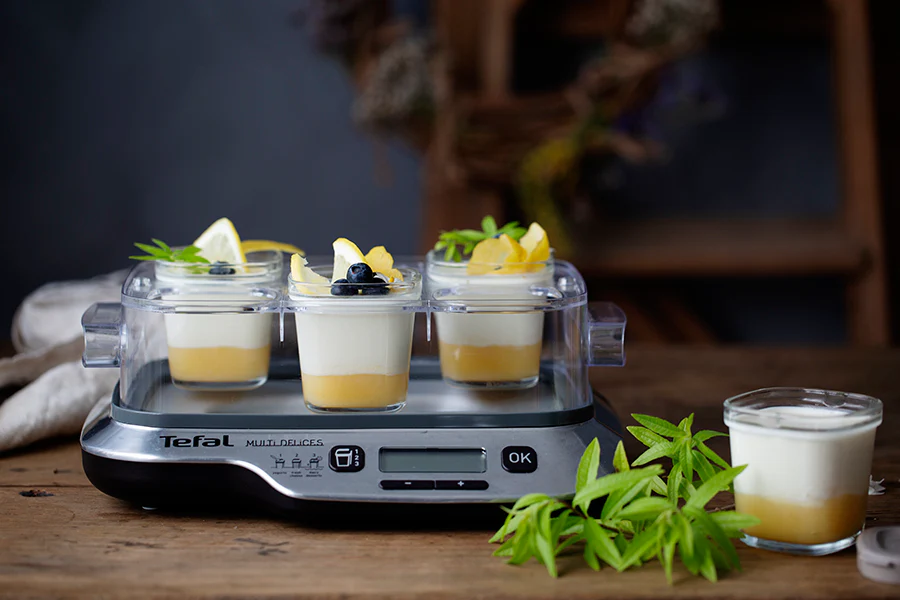
Ready to give it a go? I’ll never forget my first batch—the excitement of peeking inside after hours of waiting was a real thrill. Here’s a simple, foolproof guide to using your manual yogurt maker.
- Heat Your Milk: Pour your desired amount of milk (whole milk works best for beginners) into a saucepan. Gently heat it to about 180°F (82°C). This step, called scalding, denatures the milk proteins, which results in a thicker, creamier yogurt. Use a kitchen thermometer for accuracy.
- Cool It Down: This is a crucial step! Remove the milk from the heat and let it cool to between 110-115°F (43-46°C). If it’s too hot, it will kill the live cultures in your starter. Too cold, and they won’t activate properly.
- Introduce Your Starter: In a small bowl, mix a few tablespoons of your starter culture (this can be a couple of spoonfuls of plain, store-bought yogurt with live cultures or a powdered starter) with about a cup of the warm milk. Stir until smooth to avoid lumps.
- Combine and Mix: Pour the starter mixture back into the main pot of milk and stir gently but thoroughly to ensure the cultures are evenly distributed.
- Fill Your Yogurt Maker: Carefully pour the milk mixture into the inner container of your manual yogurt maker.
- Incubate: Secure the lid on the inner container, place it inside the insulated outer body, and close the main lid. Now, just leave it alone! Place it on your counter in a spot where it won’t be disturbed for 8-12 hours. Don’t peek, shake, or move it.
- Chill and Set: After the incubation time, the yogurt should look set, like a soft custard. Carefully remove the inner pot and place it in the refrigerator for at least 4-6 hours to chill and firm up completely. This step also stops the fermentation process.
Expert Tip: “The magic of homemade yogurt isn’t just in the taste, it’s in the gut-friendly probiotics,” says Dr. Alisha Carter, a registered dietitian and author on fermented foods. “Using a dedicated yogurt maker, whether manual or electric, provides the stable environment these beneficial bacteria need to multiply, ensuring you get a potent, probiotic-rich food every time.”
The Delicious Benefits of Homemade Yogurt
Why go through the trouble? Oh, let me count the ways. Once you start, it’s hard to go back.
- Unbeatable Flavor and Texture: You are in complete control. Want it tangier? Ferment it longer. Prefer it milder? Stop a little sooner. The freshness is simply unparalleled.
- Healthier Ingredients: You decide what goes in. No added sugars, thickeners, or artificial ingredients. It’s just milk and culture. It’s a fantastic way to boost your intake of probiotics, which are essential for gut health.
- Incredibly Cost-Effective: A gallon of milk and a small amount of starter can produce a huge batch of yogurt for a fraction of the cost of buying individual cups from the store. The savings add up quickly!
- Reduced Waste: Say goodbye to all those single-use plastic yogurt cups. Making your own in a reusable container is a small but meaningful step toward a more sustainable kitchen.
Keeping It Clean: How to Care for Your Manual Yogurt Maker
One of the best things about a manual yogurt maker is how easy it is to clean. Since there are no electronics, you don’t have to worry about water damage.
- The Inner Pot: This is the only part that gets truly dirty. Most glass, stainless steel, and plastic inner pots are dishwasher safe (check the top rack). Otherwise, simply wash it with warm, soapy water just like any other dish.
- The Outer Insulated Body: This part rarely needs more than a quick wipe-down with a damp cloth if you happen to spill something on it. Never submerge the entire insulated unit in water.
And that’s it! With proper care, a simple manual yogurt maker can last for many, many years.
Frequently Asked Questions (FAQ)
Can I make Greek yogurt in a manual yogurt maker?
Absolutely! After your yogurt is made and chilled, simply strain it through a cheesecloth or a fine-mesh strainer for a few hours in the fridge. The liquid that strains out is whey, and what’s left behind is thick, rich Greek-style yogurt.
My yogurt came out runny. What went wrong?
This is the most common beginner issue! The likely culprits are: the milk wasn’t cooled enough and killed the starter, it wasn’t warm enough to activate it, the starter culture was old or inactive, or the yogurt was disturbed during incubation. A reliable thermometer is your best friend here.
Do I have to use a powdered starter culture?
Not at all. Your starter can be 2-3 tablespoons of your favorite plain, store-bought yogurt. Just make sure the label says it contains “live and active cultures.” Once you make your first successful batch, you can use a few spoonfuls of it to start your next one!
How long will homemade yogurt last in the fridge?
Properly chilled and stored in an airtight container, your delicious homemade yogurt will stay fresh for about 1 to 2 weeks.
Is a manual yogurt maker really worth it?
If you love yogurt and enjoy simple, hands-on kitchen projects, it’s one of the best small investments you can make. It takes the guesswork out of incubation and provides consistent results without adding another complicated appliance to your countertop.
Your Journey to Perfect Yogurt Starts Here
Making yogurt at home can feel like a daunting science experiment, but it doesn’t have to be. It’s an ancient practice made incredibly simple with the right tool. A manual yogurt maker is a humble, reliable, and rewarding gadget that empowers you to create fresh, healthy, and delicious yogurt with minimal fuss. It puts you in the driver’s seat, letting you control the ingredients, the flavor, and the texture. If you’re ready to elevate your yogurt game and enjoy the pure satisfaction of making your own food from scratch, a manual yogurt maker is a fantastic first step.