Welcome to the wonderful world of homemade yogurt! There’s something deeply satisfying about transforming a simple carton of milk into a creamy, tangy, and delicious treat right in your own kitchen. But as you start your journey, questions pop up. One I hear all the time is, Can You Make Yogurt From Uht Milk? It’s a fantastic question, and the answer might just be the best-kept secret in home yogurt making. If you’ve ever felt intimidated by steps like scalding and cooling milk, get ready to have your mind blown. Let’s dive in.
The short answer is a resounding YES! Not only can you make yogurt from UHT milk, but it’s also arguably one of the easiest and most foolproof ways to get started. UHT, or Ultra-High Temperature processed milk, is a dream ingredient for aspiring yogurt makers. Because it’s been heated to a very high temperature (around 280°F or 138°C), it’s virtually sterile. This means it’s free from the competing bacteria that you’d normally have to eliminate by heating regular milk on the stove. You get to skip that entire step, saving you time and a pot to wash. This little shortcut is a complete game-changer, especially when you pair it with the precision of a yogurt maker.
Why a Yogurt Maker is Your Secret Weapon
So, what’s the big deal about a yogurt maker? Can’t you just use an oven with the light on or a warm spot in your house? Well, you could, but let me tell you from experience, it’s a recipe for inconsistency. The first time I tried making yogurt, I ended up with a soupy, separated mess because the temperature fluctuated too much.
A yogurt maker is essentially a small, brilliant appliance designed to do one thing perfectly: maintain a consistent, gentle temperature for an extended period. This is the ideal environment for the good bacteria in your starter culture to multiply and work their magic, turning liquid milk into thick, creamy yogurt.
How Does a Yogurt Maker Work?
It’s simpler than you might think. A yogurt maker gently heats the milk and starter mixture to the optimal incubation temperature—usually between 110-115°F (43-46°C)—and holds it there for several hours. This unwavering consistency is what ensures successful fermentation. It takes all the guesswork and babysitting out of the process, giving you predictable, delicious results every single time. It’s the difference between hoping for the best and knowing you’ll get great yogurt.
Bảng trống.Key Features to Look for in a Yogurt Maker
When you’re ready to pick one, here are a few things to keep in mind:
- Temperature Control: Some models have adjustable temperature settings, which is great for experimenting with different cultures.
- Automatic Timer: A built-in timer with an auto-shutoff feature is a lifesaver. You can set it and forget it without worrying about over-culturing your yogurt.
- Container Type: Do you prefer one large tub or several individual glass jars? Jars are perfect for grab-and-go portions.
- Capacity: Consider how much yogurt your household consumes. Models range from small, personal sizes to large, family-friendly batches.
- Ease of Cleaning: Look for dishwasher-safe containers to make cleanup a breeze.
Step-by-Step: How to Make Yogurt From UHT Milk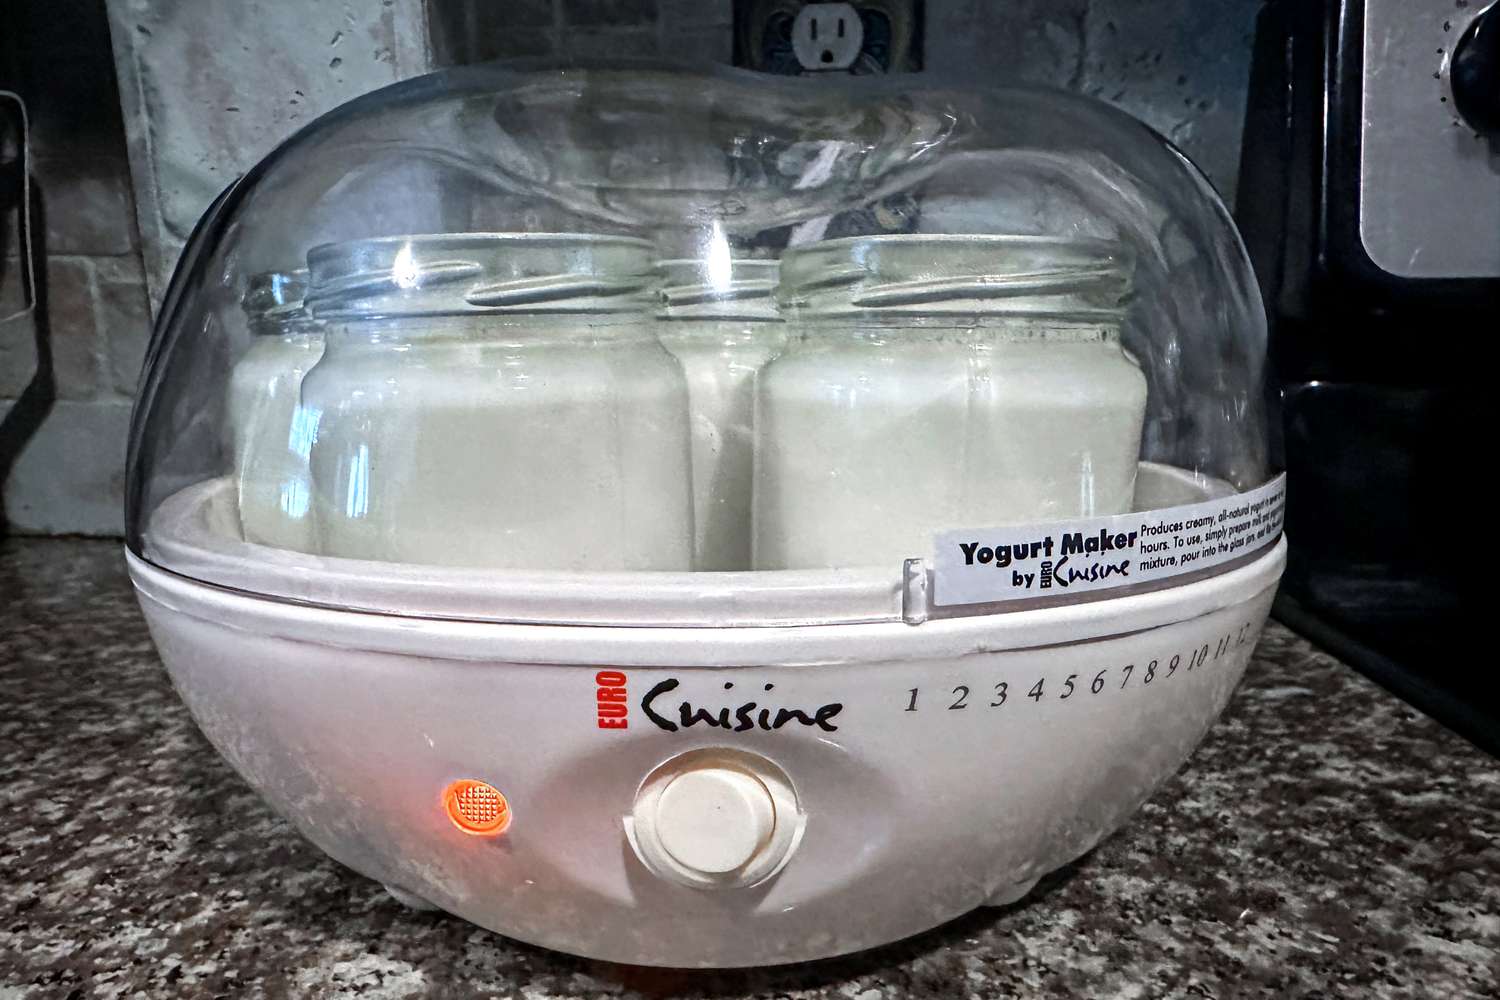
Ready to see just how easy this is? Let’s walk through the process. Forget the thermometers and the pot-watching. This is simplicity at its best.
- Gather Your Two Ingredients: That’s right, just two! You’ll need one liter (or about a quart) of full-fat UHT milk and your starter culture. For the starter, you can use 2-3 tablespoons of a plain, store-bought yogurt with live active cultures, or a packet of freeze-dried yogurt starter. Make sure the store-bought yogurt lists “live and active cultures” on the label!
- Bring Milk to Room Temperature: While you don’t need to heat it, your starter will mix in much better if the UHT milk isn’t ice-cold from the fridge. Just leave it on the counter for an hour or so.
- Activate Your Starter: In a clean bowl, mix your starter (either the store-bought yogurt or the freeze-dried powder) with a small amount of the UHT milk. Stir until it’s smooth and lump-free. This ensures the culture is evenly distributed.
- Combine and Mix: Pour the activated starter mixture into the rest of your UHT milk. If you’re using the yogurt maker’s main container, you can do this directly inside it. Whisk gently but thoroughly for about a minute until everything is well combined.
- Let the Yogurt Maker Work Its Magic: Place the container (or jars) into your yogurt maker, put the lid on, and set the timer. For a standard tangy yogurt, 8-10 hours is a great starting point. If you prefer a milder flavor, try 6-7 hours. For a tangier, more Greek-style flavor, you can go up to 12 hours.
- The Chill-Out Phase: This step is crucial! Once the timer goes off, don’t be tempted to dig in right away. The yogurt will still be warm and somewhat loose. Carefully remove the container, cover it with a tight lid, and place it in the refrigerator for at least 6 hours, or preferably overnight. Chilling stops the fermentation process and allows the yogurt to set and develop its final thick, creamy texture.
“Making yogurt at home puts you in complete control of your nutrition. Using UHT milk is a fantastic shortcut that removes a barrier for many people, making it easier than ever to enjoy fresh, probiotic-rich food without unwanted sugars or preservatives,” says Dr. Eleanor Vance, a registered dietitian specializing in gut health.
Pro Tips for Perfect UHT Milk Yogurt
You’re already on the path to success, but these little tricks will elevate your yogurt from good to absolutely amazing.
- Don’t Disturb the Culture: Once the yogurt maker is on, resist the urge to peek or stir. The bacteria need an undisturbed environment to do their work. Bumping or moving the machine can disrupt the setting process.
- For Extra Thick Yogurt: If you dream of ultra-thick, Greek-style yogurt, you have two great options. You can either whisk in 2-3 tablespoons of non-fat milk powder along with your starter in Step 4, or you can strain the finished yogurt through a cheesecloth-lined sieve for a few hours in the fridge.
- Save Your Own Starter: Once you’ve made a batch you love, you can use a few tablespoons of it as the starter for your next one! This is a great way to save money and maintain a consistent flavor. Just be sure to use it within a week for the best results.
- Flavor After Chilling: Always add flavorings like fruit, honey, or vanilla after the yogurt has been made and chilled. Adding them beforehand can interfere with the fermentation process.
The Awesome Benefits of Your Homemade Yogurt Journey
Why go to all this trouble? Because the rewards are huge.
- Healthier: You control everything that goes in. No added sugars, thickeners, or artificial ingredients. It’s packed with beneficial probiotics for great gut health.
- Cheaper: Making your own yogurt, especially when you can make yogurt from UHT milk, is incredibly cost-effective compared to buying pre-made artisanal or Greek yogurts.
- Tastier: The flavor of fresh, homemade yogurt is unparalleled. Plus, you can customize the tang and texture to be exactly how you like it.
- Less Waste: You’re reusing glass jars or containers, cutting down on single-use plastic pots from the supermarket.
Frequently Asked Questions (FAQ)
Why is my UHT milk yogurt runny?
This is usually due to one of three things: the incubation time was too short, the temperature was too low, or the starter culture wasn’t active enough. Try a longer incubation time on your next batch, and make sure your starter yogurt is fresh.
Do I still need to heat UHT milk before making yogurt?
Nope, and that’s the beauty of it! The ultra-high temperature pasteurization process has already killed off any competing bacteria, so you can skip the heating and cooling step entirely.
How long does homemade UHT milk yogurt last in the fridge?
Stored in an airtight container, your delicious homemade yogurt will stay fresh for about 1 to 2 weeks. The flavor may get a little tangier over time as the cultures continue to slowly work.
Can I use any brand of UHT milk to make yogurt?
Yes, any brand of whole or 2% UHT milk should work perfectly. Full-fat (whole) milk will generally yield a creamier, thicker final product.
What is the best starter culture for UHT milk yogurt?
Both a fresh, plain, store-bought yogurt with live cultures and a high-quality freeze-dried starter work great. Freeze-dried starters often give more consistent results and allow you to choose specific bacterial strains for different flavors and textures (e.g., Bulgarian, Greek).
Your Yogurt Adventure Awaits
So, the question of whether you can you make yogurt from UHT milk is settled with a clear, enthusiastic “yes!” It’s a fantastic, time-saving hack that makes the process more accessible and enjoyable than ever. By pairing the convenience of UHT milk with the reliability of a good yogurt maker, you’re setting yourself up for a journey filled with delicious, healthy, and rewarding results. Grab a carton of long-life milk and give it a try—you’ll be amazed at what you can create.